
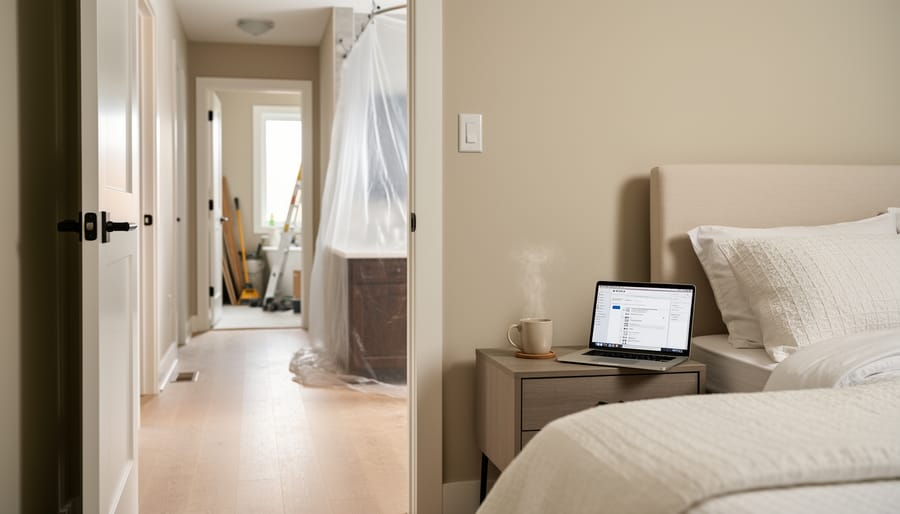
The smartest room-by-room renovation sequence for Kitchener families starts with bathrooms and kitchen last, preserving your most essential living spaces until the final phase. This strategic approach keeps your household functional, your stress manageable, and your family safely housed throughout a multi-month transformation.
I learned this lesson the hard way. When my sister tackled her three-bedroom Dundas Street home in 2024, she started with the kitchen (spoiler: big mistake). Six weeks of microwave dinners and washing dishes in the bathtub nearly broke her family. Her contractor eventually sat her down and explained what professional renovators have known for decades: you renovate outward from your comfort zones, not into them.
The typical whole-home renovation in Kitchener takes four to six months when done room by room, compared to eight to twelve weeks for a full gut job that requires temporary housing. That time difference matters when you’re balancing mortgage payments, renovation costs, and the emotional wellbeing of kids who need stability and routine.
Living through construction is absolutely doable with the right sequence. Start with guest bedrooms and secondary spaces, establish a temporary family headquarters in your primary bedroom, then systematically work through living areas before tackling your kitchen and main bathroom. This progression maintains a clean retreat space, keeps dust contained to work zones, and ensures you always have functioning plumbing and cooking facilities.
The families I’ve spoken with who successfully completed whole-home renovation services in Kitchener all emphasized one truth: sequence matters more than speed. Rush the wrong room first, and you’ll spend months in chaos. Plan the order right, and you’ll actually enjoy watching your home transform around you.
Why Room-by-Room Renovations Work for Kitchener Families
When my sister-in-law mentioned she was thinking about moving because her house needed “too much work,” I understood the impulse. But here’s what she discovered after running the numbers: selling, buying, and moving in Kitchener’s market would cost her far more than renovating the home her kids already loved.
Room-by-room renovations have become the practical choice for Kitchener families, and the reasons go beyond just finances. With the average home price in the region sitting around $700,000, moving costs stack up quickly when you factor in land transfer taxes, legal fees, realtor commissions, and the stress of uprooting your family. Most homeowners find that investing $50,000 to $100,000 into their current home delivers better value than paying $100,000+ in moving-related expenses for a house that might still need updates.
The phased approach offers distinct advantages that all-at-once renovations simply can’t match:
- Spread your budget across months or years instead of securing a massive loan upfront
- Stay in your home rather than coordinating temporary housing for your family and pets
- Learn from mistakes in early rooms and apply those lessons to later spaces
- Adapt to Kitchener’s contractor availability without rushing to book everyone simultaneously
There’s also the flexibility factor. After finishing your first room, you might realize your priorities have shifted. Maybe that home office becomes more important than the formal dining room you rarely use. Room-by-room sequencing lets you pause, reassess, and redirect funds where they’ll make the biggest impact on your daily life.
For families juggling school schedules, work commitments, and the general chaos of daily routines, breaking a large renovation into manageable chunks means you’re never completely displaced. You’ll have functioning spaces throughout the process, and that’s worth more than any spreadsheet can capture.
Planning Your Renovation Sequence: What You’ll Need
Before you swing the first hammer, you’ll need more than enthusiasm and a Pinterest board. Room-by-room renovation planning requires specific tools that’ll keep your family sane and your project on track, especially when you’re juggling school drop-offs and soccer practice between contractor visits.
Your planning toolkit should include:
- Budget spreadsheet with room-by-room cost breakdowns and a 20% contingency fund
- Floor plans showing current layout and planned changes for each space
- Contractor contact list with quotes, references, and availability windows
- Storage bins labeled by room for furniture and belongings you’ll rotate through renovation phases
- Temporary room setup supplies like portable clothing racks, folding tables, and makeshift kitchen stations
Beyond the physical items, you’ll need a timeline template that maps each room’s renovation against your family calendar. Block out school breaks, work travel, and major family events. Trust me, you don’t want drywall dust settling during your daughter’s birthday party or contractors jackhammering during exam week.
The most underrated tool? A solid family communication plan. Schedule weekly check-ins where everyone voices concerns about the upcoming phase. Create a shared digital calendar showing which rooms will be off-limits when, and establish house rules about construction zones. My kids loved having walkie-talkies to stay connected when parts of our home became no-go areas, it turned disruption into adventure.
Don’t forget practical necessities like heavy-duty plastic sheeting for dust barriers, a dedicated project binder for permits and receipts, and contact information for Kitchener’s building department. Having these essentials organized before you start means you’ll spend less time scrambling and more time actually completing your renovation sequence.
Important Considerations Before You Start
Before you knock down your first wall or rip up that outdated flooring, some critical homework will save you from costly mistakes and potential safety hazards. I learned this the hard way when we discovered our 1960s home had asbestos floor tiles in the basement, something we caught just in time before demolition started.
Start by getting a professional assessment of your home’s structural elements. Load-bearing walls cannot be removed or modified without proper engineering support, and guessing wrong can compromise your entire house. Your contractor should identify these early, but I always recommend hiring a structural engineer for an independent evaluation if you’re planning any wall removals or major layout changes. Similarly, understand where your electrical panels, plumbing stacks, and HVAC systems run. Moving a bathroom to the opposite side of the house sounds simple until you realize it requires rerouting drain lines through multiple floors.
The City of Kitchener has streamlined many processes through express Kitchener building permits for common renovations, but you’ll still need proper documentation and inspections at key stages. Factor permit timelines into your renovation sequence.
If your home was built before 1990, test for lead paint and asbestos before disturbing any surfaces. This isn’t optional with young children in the house. Professional abatement costs more than DIY removal, but the health risks aren’t worth gambling on. We kept our kids at their grandparents’ for the three days our crew handled the asbestos tiles.
Finally, consider your family’s specific needs. Does anyone have respiratory issues that dust will aggravate? Do you have toddlers who need constant supervision around construction zones? Will elderly family members struggle with temporary stairs or bathroom arrangements? Your renovation sequence should account for these realities, not just construction logic.
The Ideal Room-by-Room Renovation Sequence
Step 1: Start with Low-Impact Spaces
Starting your renovation journey with spaces your family rarely uses is honestly one of the smartest decisions you can make. That guest bedroom that sees visitors twice a year? Perfect. The home office you’ve been meaning to upgrade? Ideal first candidate. Your underutilized basement? Excellent testing ground.
These low-stakes spaces give you invaluable experience working with contractors without the panic of “where will we cook dinner tonight?” You’ll learn how your chosen team communicates, whether they show up on time, and how they handle unexpected issues, all while your daily routines continue uninterrupted upstairs.
I started our renovation with a spare bedroom, and it was like a dress rehearsal. We discovered our contractor preferred text updates over calls, learned that dust travels farther than we expected (hence why I now share low-tox cleaning tips with everyone renovating), and figured out the best times for noisy work around nap schedules.
Plus, you’ll build confidence. Completing one room gives you momentum and realistic expectations before tackling the spaces where disruption really matters.
Step 2: Tackle One Bathroom (Not Your Only One)
Never underestimate how fast a bathroom renovation becomes your family’s most-talked-about topic. If you’ve got multiple bathrooms, tackle the least-used one first, your powder room or that upstairs bath the kids avoid. This gives your contractor room to problem-solve when they discover cast iron pipes that crumbled during demolition, which happens more often than you’d think in Kitchener’s older neighbourhoods.
Here’s the rule: always keep one full bathroom operational. Sounds obvious until you’re three days into demo and everyone’s arguing over shower schedules. If you’re renovating your main bathroom, set strict timelines with your contractor. We insisted ours guarantee basic toilet and sink function every evening, even if that meant temporary fixtures. They weren’t thrilled, but it saved our sanity.
Time bathroom work around your family’s rhythm. Summer’s ideal if kids can shower after outdoor play rather than before school. Avoid December when house guests arrive and everyone suddenly needs that second bathroom you’re gutting.
Test all plumbing thoroughly before calling it done. Run the shower for ten minutes, fill and drain the tub twice, flush repeatedly. You want leaks discovered now, not during your daughter’s morning routine.
Step 3: The Kitchen Challenge
The kitchen renovation hits differently when you have a family counting on three meals a day. I learned this the hard way when my kids asked for the third consecutive night if cereal counted as dinner.
Before demolition day arrives, set up your temporary kitchen in a space with water access, your dining room, basement, or even a covered patio works. You’ll need a microwave, electric kettle, slow cooker, and a mini-fridge. Add a coffee maker unless you want to fund your local café’s expansion. A folding table becomes your prep counter, and plastic bins store dry goods and dishes.
Meal planning becomes non-negotiable. Prep and freeze casseroles, soups, and marinated proteins before construction starts. Stock up on quality disposable plates to save your sanity, this isn’t the time for eco-guilt about paper goods. Embrace one-pot meals, sheet pan dinners you can cook in a toaster oven, and strategic takeout nights.
Timing matters enormously. Schedule your kitchen renovation during your family’s slower season. For us, that meant summer when the kids could eat outside and we grilled constantly. Avoid December if you host holidays, September during back-to-school chaos, or your family’s birthday season.
Most families survive on a temporary setup for six to eight weeks. Plan for ten, hope for six, and you’ll stay sane when the tile shipment gets delayed.
Step 4: Living and Family Spaces
By this stage, you’ve learned what works and what doesn’t, and now you’re ready to tackle the heart of your home where everyone actually spends time together.
Living and family rooms present a unique challenge because these are your default gathering spots. Movie nights, homework sessions, weekend game marathons, all of it happens here. The key is creating a temporary “family headquarters” elsewhere before demolition starts. We converted our dining room into a makeshift living space for six weeks, complete with the sectional, TV, and toy bins. It wasn’t pretty, but it kept routines intact.
Schedule this phase during warmer months when kids can play outside more often, reducing the indoor chaos. Set firm construction hours that end before dinner, protecting that crucial family time. Use the opportunity to purge toys and items you’ve been meaning to declutter, you’ll thank yourself when it’s time to set up the finished space.
Consider renovating adjacent rooms simultaneously if they share walls or electrical work. Our family room and adjoining playroom went together, cutting the total disruption time nearly in half and saving on contractor mobilization costs.
Step 5: Bedrooms Last
By the time you reach the bedrooms, you’ll be grateful you saved them for last. Sleep is non-negotiable when you’re living through a renovation, and those bedroom doors closing out construction dust and noise each night become your family’s sanctuary.
I learned this the hard way during our first renovation attempt. We tackled our master bedroom second, thinking we’d enjoy the finished space longer. Instead, we spent months sleeping on a pull-out couch while finishing other rooms, growing more exhausted and irritable by the week. When we renovated our second home, bedrooms went dead last, and the difference was remarkable.
Intact bedrooms offer psychological relief too. When everything else is in flux, those familiar sleeping spaces anchor your family’s routine. Kids especially need this stability. Their rooms remain predictable safe zones while the rest of the house transforms around them.
You’re also less precious about perfection by this point. That fourth contractor meeting doesn’t feel quite as draining. You know what questions to ask, what finishes you actually want, and which battles aren’t worth fighting. Renovation fatigue is real, but finishing strong in spaces designed for rest feels almost poetic.
Creating Livable Spaces During Each Phase
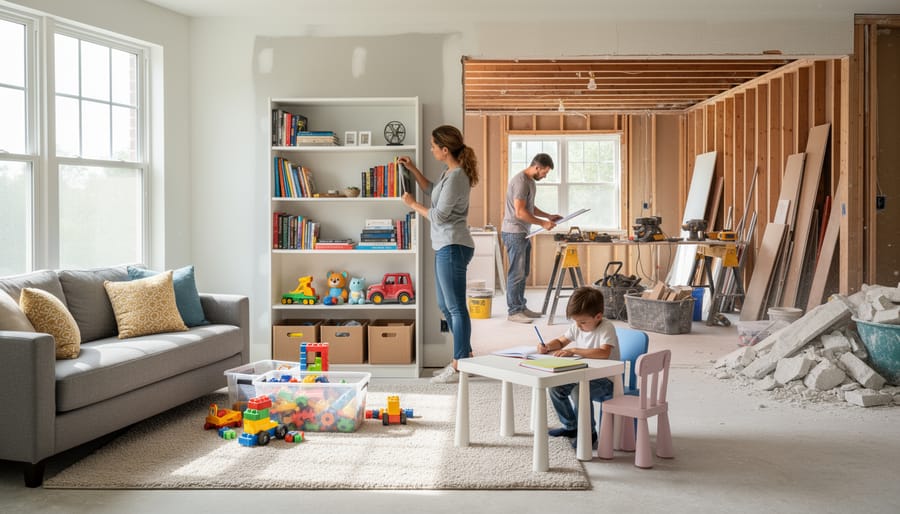
Living through renovation chaos taught me that small systems make all the difference. When we tackled our kitchen, I carved out a corner of the dining room for a makeshift setup: microwave on a rolling cart, toaster oven beside it, cooler for perishables, and a dish bin with soap and sponges. It wasn’t pretty, but it worked. Stress-free meal prep became essential during this phase, keeping us fed without daily cooking stress. I batch-cooked on weekends when the dust settled and relied heavily on one-pot meals.
Dust barriers are non-negotiable. Heavy plastic sheeting and zipper doorways contained the mess surprisingly well, though I learned to tape floor edges after finding drywall dust everywhere. We ran air purifiers constantly and kept a dedicated vacuum near the work zone.
Noise management saved our sanity. I asked contractors to schedule loud work between 9am and 3pm when kids were at school, protecting morning routines and evening homework time. They understood once I explained we had young children. Weekend noise was off-limits entirely.
Keeping mindful kitchen routines grounded us even when our actual kitchen was gutted. We maintained breakfast together at our temporary table and kept bedtime rituals sacred. Kids adapted better than expected when we framed it as an adventure rather than an ordeal. The key was consistency wherever possible and flexibility everywhere else.
How to Know Each Room Is Truly Complete
You can’t truly move forward with confidence until you’ve closed the book on the current room, and that means more than just eyeballing the finished product. A proper completion checklist protects you from starting the next phase only to realize you need tradespeople back in the previous space, disrupting your carefully planned sequence all over again.
Your verification checklist should include:
- All trades have completed their work and provided final sign-off or warranty documentation
- Permits have been inspected and officially closed with the City of Kitchener
- Deep cleaning after renovations has removed all dust, debris, and construction residue
- Furniture and belongings have been moved back into the space
- Your family has lived with and used the room for at least one week to identify any issues
- Final budget has been reconciled and all invoices paid before contractor moves to next phase
That one-week family test period matters more than you might think. Light switches in awkward spots, cabinet doors that don’t quite close, or storage that looked perfect on paper but doesn’t work for your actual belongings, these issues surface quickly when you’re actually living in the space, not just admiring it.
Before declaring a room done, gather your family for a functionality walk-through. Can everyone reach what they need? Does the lighting work for homework, cooking, or getting ready in the morning? Does anything feel unsafe or incomplete? Kids often spot problems adults miss simply because they use spaces differently.
If you hit major budget overruns or discover structural issues, it’s perfectly acceptable to pause your sequence. Some families wait three to six months between rooms to rebuild savings or emotional energy. Others adjust the order entirely, skipping ahead to a less expensive room while they regroup. Flexibility here prevents renovation burnout and keeps your family life stable.
Common Questions About Room-by-Room Renovations
I’ve watched families freeze mid-renovation, panicked and unsure whether they’re making the right calls. You’re not alone in having questions, these concerns come up in every room-by-room project I’ve seen or experienced myself.
How long should we wait between rooms?
Most families benefit from a two to four week break between major rooms to recover emotionally and financially. This pause lets you address any punch-list items, reassess your budget, and give your family breathing room before the next phase of disruption begins.
Can we skip rooms and come back later?
Absolutely, as long as you’re not creating dependencies that complicate future work. Just avoid situations where skipping a room means tearing into finished spaces later, like leaving electrical or plumbing rough-ins incomplete when adjacent rooms will need those systems.
How do we handle unexpected issues that pop up?
Build a 15-20 percent contingency into each room’s budget and timeline. When surprises happen, and they will, especially in older Kitchener homes, you’ll have financial cushion and schedule flexibility to address them without derailing the entire project.
What if our budget runs out mid-project?
Finish the current room to a livable state, then pause. It’s better to have three beautifully completed rooms and two untouched ones than five half-finished disasters. You can always resume later when funds replenish.
How do we keep kids safe during construction?
Establish hard boundaries with physical barriers like temporary walls or locked doors, schedule noisy or hazardous work during school hours when possible, and have daily safety talks with your children about off-limit zones. Never assume kids will remember the rules without reminders.
Should we use the same contractor for every room?
If your first-room contractor performs well, keeping them often saves time on coordination and maintains quality consistency. However, don’t feel locked in, switching contractors between phases is completely reasonable if issues arise or if another pro offers better expertise for specific rooms.
These questions reflect real anxieties, and addressing them upfront helps you move through your renovation with confidence rather than constant second-guessing. Trust your instincts, communicate openly with your family and contractors, and remember that flexibility is your friend throughout this process.
Your Renovation Roadmap
Think of this roadmap as your family’s personal renovation GPS. The path won’t be perfectly straight, and you might need to recalculate occasionally, but you’ll reach your destination with your sanity intact.
The core principles are simple but powerful. Starting with spaces like a guest room or basement lets you test your contractor relationship and renovation tolerance without disrupting critical family functions. This builds your confidence before tackling bigger challenges.
Never compromise on having one working bathroom and a functional kitchen space, even if it’s makeshift. These non-negotiables protect your family’s basic comfort and reduce the temptation to abandon ship midway through. I learned this the hard way when we tried to renovate both bathrooms simultaneously, trust me, you don’t want that experience.
Schedule regular family check-ins to address frustrations before they boil over, and keep your contractor loop tight with weekly updates. And here’s the part many people skip: celebrate finishing each room. Order pizza in your new kitchen, have a movie night in the completed family room, or just take photos to remember how far you’ve come. These milestones fuel motivation for the next phase and remind you why you started this journey.
Taking on a room-by-room renovation while your family is living in the house might feel overwhelming at first, but you’ve got this. With the sequencing strategy and planning tools we’ve covered, you can transform your Kitchener home without uprooting your entire life. Yes, there will be dusty days and moments when you question your sanity, but thousands of families have successfully renovated this way, and yours can too.
Remember, there’s no one-size-fits-all timeline. Some families breeze through rooms in weeks, while others need months between phases to recharge emotionally and financially. Both approaches are perfectly valid. What matters most is creating a sequence that respects your family’s rhythms, protects your sanity, and keeps everyone safe and reasonably comfortable.
The beauty of phased renovations is that you can pause, adjust, and learn as you go. Maybe you’ll discover halfway through that you need a longer break between rooms than you planned, or perhaps you’ll find a groove and want to accelerate. Listen to your family, trust your instincts, and be flexible.
Now I’d love to hear from you. Have you tackled a room-by-room renovation in Kitchener? What sequence worked best for your family, and what would you do differently next time? If you’re just starting to plan, what room are you most nervous about renovating, and what questions can our community help answer? Share your experiences, tips, or concerns in the comments below. We’re all in this together.