
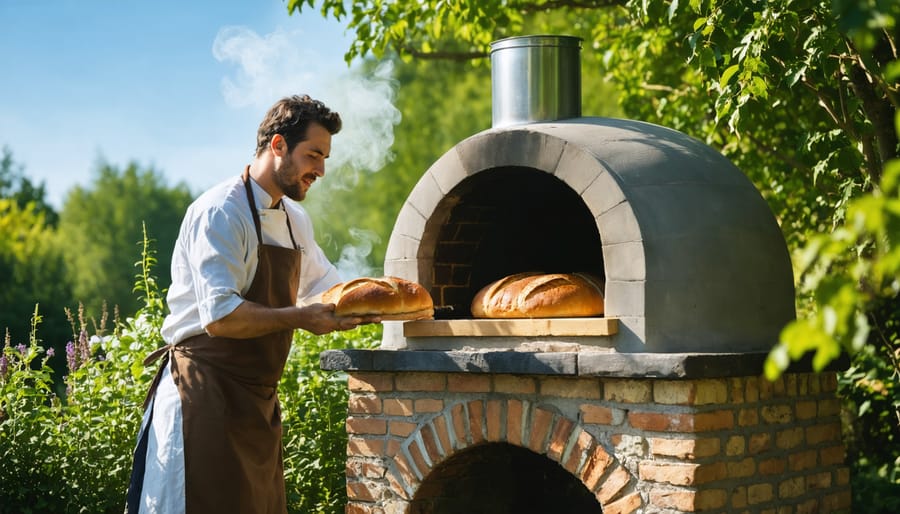
Imagine pulling a perfectly crusty loaf of bread from your very own backyard clay oven, its earthy aroma mingling with the warmth of wood smoke. Like countless generations before us, building a clay oven connects us to one of humanity’s oldest and most rewarding outdoor cooking methods. Beyond the romantic appeal, a clay oven transforms your backyard into a sustainable cooking space where temperatures can reach over 900°F, creating everything from crispy-bottom pizzas to slow-roasted meats with unmatched flavor.
While the project requires dedication – typically a weekend of hands-on work and about $150 in materials – the results will revolutionize your outdoor entertaining and provide years of joyful cooking experiences. Whether you’re drawn to the idea of baking authentic sourdough, hosting memorable pizza parties, or simply embracing a more traditional way of cooking, building your own clay oven is a deeply satisfying journey that combines ancient wisdom with modern craftsmanship.
Why Every Food Lover Needs a Clay Oven
The Magic of Heat Distribution
The secret behind a clay oven’s incredible cooking ability lies in its unique heat distribution properties. Unlike modern ovens, clay ovens create a perfect harmony of three types of heat: radiant heat from the dome, convection heat from the air circulation, and conduction heat from the cooking floor. When I first learned about this trio of heating methods, it completely transformed my understanding of why pizza from a clay oven tastes so different!
The thick clay walls absorb and store heat evenly, gradually releasing it back into the cooking chamber. This creates those perfectly crispy pizza crusts and tender, juicy roasts we all dream about. The dome shape plays a crucial role too, reflecting heat downward and ensuring even cooking from all angles. Plus, the natural properties of clay help maintain consistent temperatures, which is why breads develop that gorgeous golden crust while staying beautifully moist inside.
Remember those family pizzerias with their wood-fired ovens? That’s exactly the magic we’re recreating in our backyards!
Flavor Enhancement Secrets
Have you ever wondered why food from a clay oven tastes uniquely delicious? The secret lies in the magical combination of heat distribution and moisture retention that creates a truly mindful cooking experience. Clay ovens work like natural pressure cookers, sealing in flavors while allowing food to breathe.
The porous nature of clay creates a unique environment where moisture is regulated perfectly. As food cooks, the clay walls release just enough moisture to keep dishes tender while maintaining that coveted crispy exterior. The dome shape ensures heat circulates evenly, creating a natural convection effect that bathes your food in consistent warmth from all angles.
What’s truly special is how clay imparts subtle earthy minerals to your dishes, enhancing their natural flavors in ways that modern ovens simply can’t replicate. It’s like having nature’s own seasoning built right into your cooking vessel!
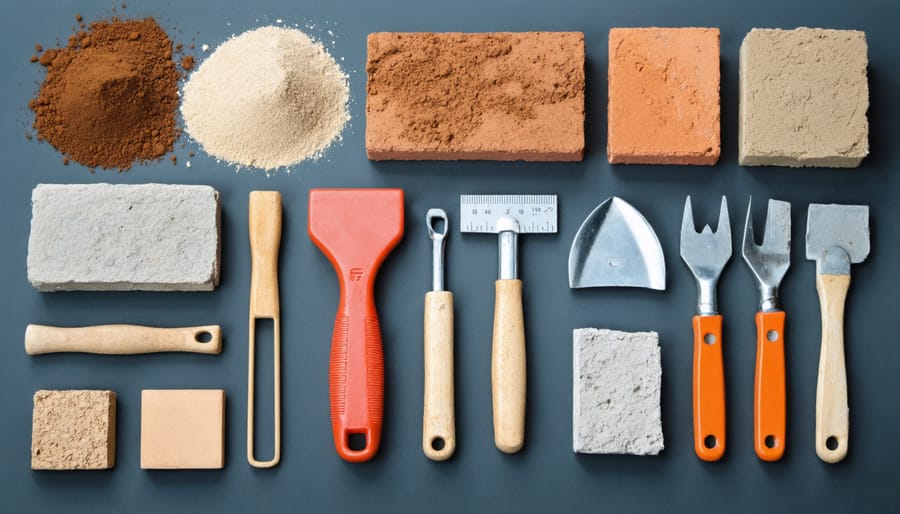
Essential Materials and Tools
Before we dive into the magical world of clay oven building, let’s gather everything we’ll need for this exciting project. Don’t worry if you can’t find exact matches – I’ll share some clever alternatives that work just as well!
For the Clay Mixture:
– Clay soil (about 150-200 pounds) – You can source this from your backyard or local suppliers
– Sand (about 100 pounds) – Regular builder’s sand works perfectly
– Straw or hay (2-3 large handfuls) – Shredded paper can work in a pinch
– Water – Clean tap water is fine
Basic Tools:
– Large mixing tarp or sturdy wheelbarrow
– Sturdy spade or shovel
– Garden rake
– Heavy-duty gloves
– Large bucket for water
– Measuring tape
– Spirit level
– Old wooden planks for mixing
Foundation Materials:
– Bricks or concrete blocks (about 30-40 pieces)
– Gravel or crushed stone (about 100 pounds)
– Portland cement (one 50-pound bag)
– Metal grate or thick wire mesh
Shaping and Finishing Tools:
– Empty wine bottles or rolling pin
– Plastic sheets for covering
– Old newspapers
– Spray bottle for water
– Wooden mold or large beach ball for dome shape
– Pruning shears for cutting straw
Optional but Helpful:
– Thermometer for checking oven temperature
– Pizza peel or wooden board
– Wire brush for cleaning
– Natural fiber brush for sweeping
– Small trowel for smoothing
Remember, our ancestors built these ovens with far fewer tools, so don’t feel pressured to have everything perfect. Many of these items might already be lurking in your garage or garden shed. I’ve found that the community is often wonderfully generous – you might be able to borrow some tools or even get materials donated by neighbors who are excited about your project!
A quick tip from my experience: collect your materials over a few weeks rather than all at once. This approach helps spread out the cost and gives you time to source quality items at better prices.
Building Your Clay Oven Step by Step
Foundation and Base
Just like building a house, your clay oven needs a solid foundation to stand the test of time and temperature. I learned this the hard way when I first attempted to build my oven on unstable ground – trust me, you don’t want to see your creation slowly tilt to one side!
Start by selecting a level spot in your yard, preferably on slightly elevated ground to prevent water pooling. Create a circular base about 4 feet in diameter using concrete blocks or bricks. I recommend laying them in a spiral pattern, which not only looks beautiful but provides excellent stability.
Next, fill the space between the blocks with a mixture of gravel and sand, tamping it down firmly as you go. This creates a crucial drainage layer that helps prevent moisture from seeping up into your oven. Top this with a layer of fire bricks laid flat – these special bricks are designed to withstand high temperatures and will form the actual floor of your oven.
Remember to check that everything is perfectly level using a spirit level. A wonky foundation means a wonky oven, and nobody wants their pizzas sliding to one side!
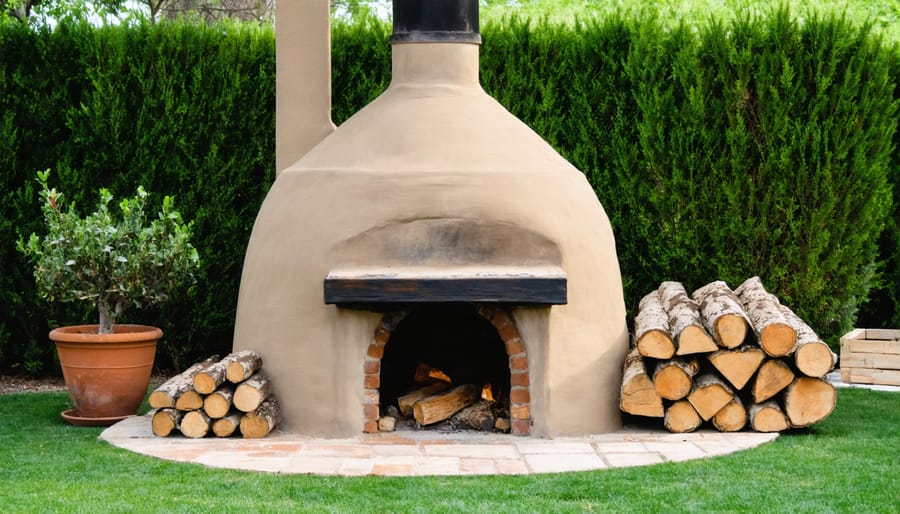
Dome Construction
Now comes the most exciting part of building your clay oven – creating that beautiful dome shape that will soon house countless delicious meals! I remember feeling a bit nervous during this stage of my first build, but trust me, it’s like playing with clay as a kid, just on a bigger scale.
Start by forming small clay balls about the size of oranges. Working from the base up, place these balls in a circular pattern, pressing them firmly together. Each layer should lean slightly inward as you build upward, naturally creating the dome shape. I find it helpful to use my hands to smooth and blend the clay balls together, both inside and out, ensuring there are no weak spots or gaps.
Keep a spray bottle of water handy – you’ll want to maintain the right moisture level as you work. The clay should be pliable but not too wet. If it starts sticking to your hands excessively, it’s too wet; if it’s cracking, it needs more moisture.
As you reach the top of the dome, the circles will get progressively smaller. The final opening at the top should be about 8-10 inches in diameter – this will be your chimney. Throughout the process, step back occasionally to check that your dome remains symmetrical and balanced.
Remember, perfection isn’t necessary – those little irregularities add character to your oven and won’t affect its performance. Once you’ve completed the dome, smooth the entire surface with wet hands or a wooden float. This final touch not only makes your oven look more polished but also helps prevent future cracking.

Adding the Finishing Touches
Now comes my favorite part – adding those final touches that transform your clay oven from a basic structure into a weatherproof, beautiful outdoor focal point! I remember the satisfaction of completing these last steps on my own oven, knowing it would stand the test of time.
Start by applying a protective lime wash coating to the exterior. Mix one part lime with four parts water, and brush it on evenly. This natural sealant helps prevent water damage while allowing the oven to breathe. For extra protection in rainy climates, consider creating a simple roof overhang or installing a removable cover.
Add personality to your oven with decorative elements that reflect your style. You might press mosaic tiles into the outer layer while it’s still slightly damp, or create textured patterns using simple tools. Some of my community members have added lovely touches like hand-painted designs or embedded colored glass pieces.
Don’t forget the practical additions! Install a sturdy door to retain heat and protect the interior. A basic wooden door lined with metal works well, or you can invest in a purpose-made clay oven door. Finally, create a designated space for your tools nearby – you’ll want your pizza peel, brushes, and thermometer within easy reach when you’re cooking.
Once everything’s complete, let your oven cure completely for about a week before the first firing. Trust me, the wait is worth it!
Curing and Maintenance
Now that your clay oven is built, proper curing is essential for its longevity and performance. Think of it like seasoning a cast-iron skillet – it’s a process that requires patience but pays off tremendously. I learned this firsthand when I rushed the curing of my first clay oven and ended up with frustrating cracks.
Start by letting your oven dry naturally for 3-5 days, depending on your climate. Once it’s dry to the touch, begin the curing process by building very small fires (about the size of your palm) and maintaining them for 2-3 hours. Gradually increase the fire size over the next week, building slightly larger fires each day. This slow process allows the clay to adjust to the heat without developing stress cracks.
For long-term maintenance, always protect your oven from rain with a weatherproof cover when not in use. Regular inspection for cracks is crucial – small fissures can be easily repaired with a clay slip mixture, but only when the oven is completely cool. As part of your energy-efficient cooking methods, sweep out ash after each use and maintain a small gap between the oven floor and walls to ensure proper air circulation.
Remember to re-apply a protective layer of lime wash annually, especially before winter. This simple maintenance routine will keep your clay oven performing beautifully for years to come, creating countless memories of delicious wood-fired meals with family and friends.
Getting Started with Your Clay Oven
Before lighting your first fire, it’s essential to properly season your clay oven – think of it as getting to know your new cooking companion! Start with small fires over 3-4 days, gradually increasing their size to help remove any remaining moisture and prevent cracking. I remember being so excited about my first clay oven that I rushed this step, but trust me, patience here pays off!
Temperature control is your next exciting challenge. Using a combination of traditional cooking techniques and modern know-how, you’ll soon master the art of maintaining perfect cooking temperatures. Start by building your fire in the center of the oven and letting it burn for about 2-3 hours until the dome turns whitish – this means it’s reached optimal temperature.
To check if your oven is ready, try the flour test: throw a pinch of flour inside – if it browns gradually over 10-15 seconds, you’re good to go! If it burns instantly, let the oven cool a bit. Keep a thermometer handy, but don’t rely solely on it; learning to read your oven’s signs is part of the journey.
For best results, remove the embers before cooking and let the heat distribute evenly for about 15 minutes. Different foods need different temperatures, so keep a cooking journal to track what works best for your favorite dishes.
Building your own clay oven is truly a rewarding journey that connects you to centuries of traditional cooking wisdom. As someone who took this path myself, I can tell you that while the process requires patience and attention to detail, the results are absolutely worth every minute spent crafting your outdoor masterpiece.
Remember, your first firing might not be perfect, and that’s completely okay! Each oven develops its own unique character, much like a cherished family recipe passed down through generations. If you notice any small cracks after the first few uses, don’t be discouraged – this is normal and often adds to the oven’s charm.
For the best results, keep these final tips in mind: always allow proper drying time between layers, maintain a detailed log of your firing temperatures, and build a supportive community of fellow clay oven enthusiasts. I’ve found that sharing experiences and tips with others who share this passion has made my journey even more enriching.
As you begin cooking in your new oven, you’ll discover that each meal becomes a celebration, bringing friends and family together in a way that modern appliances simply can’t match. The satisfaction of pulling out your first perfectly baked bread or crispy pizza from an oven you built with your own hands is simply unmatched.
So go ahead, embrace this beautiful craft, and let your clay oven become the heart of your outdoor cooking adventures. Your journey to authentic, traditional cooking starts here!