

Knead your way into the ancient art of bread making, where flour, water, and time transform into crusty, aromatic loaves that have graced tables for millennia. Through mindful cooking techniques, traditional bread making becomes a meditative dance between baker and dough, connecting us to generations of artisans who perfected these timeless methods.
The gentle stretch and fold of glutenous strands, the patient watch over slowly fermenting sourdough, and the satisfying crackle of a perfectly baked crust – these sensory experiences tell the story of bread making in its purest form. Before industrial mixers and instant yeast changed our relationship with bread, bakers relied on intuition, temperature, and time to create nourishing loaves that sustained communities.
Today, as we return to these time-honored practices, we discover that traditional bread making offers more than just superior flavor and texture. It provides a moment to slow down, connect with our food, and participate in one of humanity’s oldest culinary traditions. Whether you’re a novice baker or an experienced home chef, mastering these fundamental techniques opens the door to creating authentic, wholesome bread that tells its own unique story.
The Magic of Sourdough Starters

Creating Your First Starter
Creating your own sourdough starter is like nurturing a tiny pet – it needs regular attention and care, but the reward is absolutely worth it! When I started my sourdough journey, I was amazed at how simple flour and water could transform into something so magical.
To begin, mix ½ cup of whole wheat flour with ¼ cup of room-temperature water in a clean glass jar. The mixture should be thick but stirrable. Leave it partially covered at room temperature for 24 hours. You might notice a few bubbles starting to form – that’s the wild yeast coming to life!
Each day for the next week, discard half of your mixture and feed it with equal parts flour and water (¼ cup each). This may feel wasteful, but it’s essential for developing a healthy starter. Keep your jar in a warm spot, ideally between 65-80°F.
By day 3 or 4, you should notice a pleasant, slightly tangy aroma and more consistent bubbling. Don’t worry if it takes longer – every starter develops at its own pace. Your starter is ready to use when it reliably doubles in size within 4-8 hours after feeding.
Remember, consistency is key! Feed your starter at the same time each day, and soon you’ll have a vibrant, active culture ready to create countless loaves of delicious homemade bread. I still use my starter from five years ago, and it’s become such a cherished part of my weekly baking routine.
Keeping Your Starter Alive
Keeping a sourdough starter alive is like nurturing a pet – it needs regular care and attention, but the rewards are absolutely worth it! I remember when I first started my journey with traditional bread making, I was so nervous about maintaining my starter. Now, it’s become second nature, and I’m excited to share these tried-and-true tips with you.
The key to a healthy starter is consistent feeding. Think of it as a morning ritual: remove half of your starter, then add equal parts flour and water to the remaining portion. For daily bakers, feed your starter every 24 hours at room temperature. If you bake less frequently, store it in the refrigerator and feed it weekly.
Watch for these signs of a happy starter: bubbles throughout, a pleasant sour aroma, and consistent rise and fall patterns. If your starter seems sluggish, try using filtered water and unbleached flour for a few feedings. A common issue is seeing liquid on top (we call it “hooch”) – this just means your starter is hungry and needs feeding.
Don’t panic if you forget a feeding or two! Starters are remarkably resilient. If you notice any pink or orange coloring, or detect an off-putting smell, it’s best to start fresh. But with regular care, your starter can last for years, even decades, becoming a cherished part of your bread-making tradition.
Remember, every starter develops its own unique personality, so don’t worry if yours behaves slightly differently from others. Trust your instincts and enjoy the process!
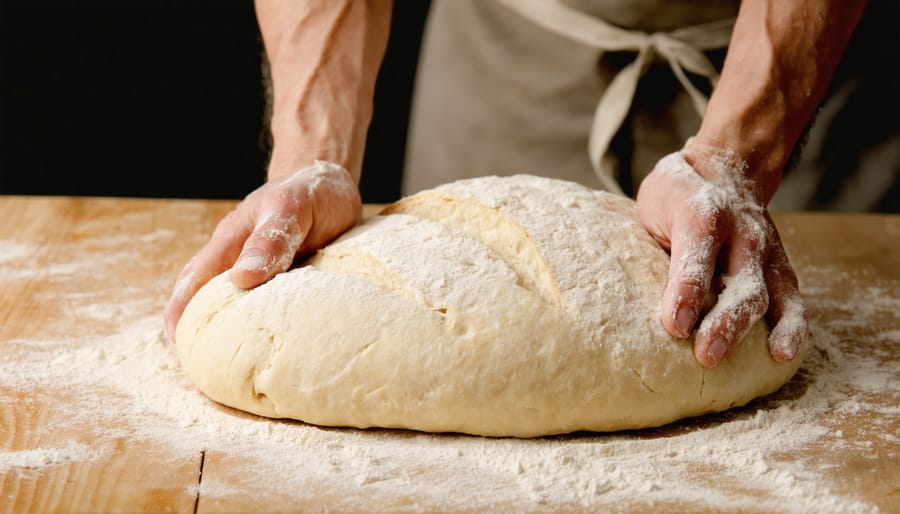
Essential Hand-Kneading Techniques
French Fold Method
The French fold method is one of those beautiful techniques that’s all about preserving food traditions while creating that perfect artisanal loaf. I learned this technique from my grandmother, and it’s become my go-to method for developing gluten without overworking the dough. Here’s the magic: instead of aggressive kneading, you’ll gently stretch the dough into a rectangle, then fold it like a letter. Think of it as giving your dough a gentle massage rather than a workout!
Start by stretching one end of the dough away from you, then fold it back toward the center. Next, stretch the opposite end and fold it over the first fold. Turn the dough 90 degrees and repeat the process. This method creates those lovely layers that give French bread its characteristic texture and helps develop strength in the dough without deflating those precious air bubbles. Perform this sequence every 30 minutes during the first rise, and you’ll be amazed at how your bread develops that perfect structure that French baking is famous for.
Italian Stretch and Fold
The Italian stretch and fold technique is one of my favorite ways to develop gluten in bread dough, and I love how it transforms a shaggy mixture into a smooth, elastic masterpiece. Unlike aggressive kneading, this gentle method involves periodically stretching the dough and folding it over itself, usually at 30-minute intervals during the first few hours of fermentation.
To perform this technique, lightly wet your hands (this prevents sticking!) and grab one edge of the dough. Gently pull it upward until you feel some resistance, then fold it back over the center. Rotate your bowl a quarter turn and repeat this process on all four sides. It’s like giving your dough a loving hug from all directions!
You’ll notice the dough becoming smoother and more structured with each set of folds. I typically perform this process 3-4 times during the first 2 hours of fermentation. What I love most about this method is how it preserves those precious air bubbles that create that beautiful, open crumb structure Italian bread is famous for.
Middle Eastern Hand Rolling
There’s something truly magical about watching skilled hands transform a simple ball of dough into a perfectly round flatbread. In Middle Eastern bread making, the art of hand rolling is passed down through generations, creating connections between past and present through the gentle motion of palms against dough.
The technique begins with portioning the dough into small, even balls. Each ball is then pressed gently with the fingertips, starting from the center and working outward. The real magic happens as experienced bakers use their palms to roll the dough in circular motions, gradually stretching it into an even circle.
What I love most about this method is how it allows you to feel the dough’s readiness – you’ll notice it becoming more pliable and cooperative as you work with it. Many home bakers find it therapeutic, almost meditative, as they develop their own rhythm. While it may take some practice to achieve the paper-thin consistency typical of traditional lavash or the perfect thickness of pita, remember that every skilled baker started as a beginner.
A helpful tip from my Lebanese grandmother: keep your work surface lightly floured but not overly so – just enough to prevent sticking while maintaining control over the dough’s movement.
The Art of Natural Fermentation
Temperature and Time
Temperature and time are the dynamic duo in traditional bread making, working together like a carefully choreographed dance. As someone who’s learned through countless loaves (and a few memorable mishaps!), I can tell you that mastering these elements is key to achieving that perfect rise and flavor.
Your dough’s ideal fermentation temperature typically falls between 75-85°F (24-29°C). Think of it as creating a cozy environment where your yeast can thrive – not too hot, not too cold. Just like we all work better in comfortable conditions, so does your bread! During cooler months, I love using my oven with just the light on as a makeshift proofing box.
The fermentation time can vary from 2-4 hours for a first rise, depending on your room temperature and recipe. Here’s a little baker’s secret: slower fermentation at cooler temperatures actually develops more complex flavors. This is why many artisanal bakers incorporate healthy cooking practices like overnight refrigerator proofing into their routines.
Remember, your dough will tell you when it’s ready – it should roughly double in size and feel light and airy when gently poked.
Reading Your Dough
One of my favorite parts about traditional bread making is learning to read your dough like a story. When I first started baking, I relied heavily on timers and recipes, but now I know that the dough itself tells you everything you need to know about its readiness.
A properly fermented dough will have a slightly domed surface with tiny bubbles visible underneath the surface. When you gently press it with your finger, it should slowly spring back, leaving a slight indentation – this is what bakers call the “finger poke test.” If it springs back too quickly, it needs more time; if it doesn’t spring back at all, it’s over-fermented.
The aroma is another telling sign. A well-fermented dough has a pleasant, sweet-sour smell, similar to ripe fruit. As you handle the dough, it should feel alive and buoyant, with a silky texture that’s neither too sticky nor too dry.
Trust your senses and don’t be afraid to get your hands dirty. With practice, you’ll develop an intuitive understanding of when your dough has reached that perfect moment for the next step in your bread-making journey.
Traditional Baking Methods
Wood-Fired Ovens
There’s something magical about watching flames dance in a wood-fired oven as they transform simple dough into crusty, aromatic bread. I’ll never forget my first visit to a traditional bakery in Tuscany, where the baker explained that wood-fired ovens have been the heart of artisanal bread making for thousands of years.
These ovens work by trapping and radiating heat from burning wood, creating unique baking conditions that modern ovens simply can’t replicate. The intense heat (typically between 600-900°F) creates that sought-after crackling crust while keeping the inside perfectly chewy and moist. What’s particularly special is how the temperature gradually decreases over time, allowing bakers to cook different types of bread throughout the day.
The type of wood used matters too – hardwoods like oak and maple are preferred because they burn longer and cleaner, adding subtle smoky notes to the bread. While most of us don’t have access to traditional wood-fired ovens at home, you can still experience this ancient method by seeking out local artisanal bakeries or joining community baking events. Some neighborhoods even have communal outdoor ovens where families gather to bake together, keeping this time-honored tradition alive.

Dutch Oven Magic
There’s something magical about pulling a perfectly crusty loaf of bread from a Dutch oven – it’s like uncovering a treasure! As a home baker, I discovered that this humble pot is the secret weapon for creating bakery-worthy bread right in your kitchen. The heavy cast iron and tight-fitting lid create the perfect mini bread oven, trapping steam and heat to develop that gorgeous golden crust we all dream about.
What makes Dutch oven baking so special is how it mimics professional bread ovens through energy-efficient baking methods. The enclosed environment allows the bread to undergo a beautiful transformation – the steam helps create that crispy, crackly crust while keeping the inside tender and chewy.
To get started, preheat your Dutch oven in the oven for about 30 minutes. When your dough is ready, carefully transfer it into the hot pot, cover with the lid, and let the magic happen. The result? A perfectly round artisanal loaf with professional-looking scores and that irresistible fresh-baked aroma that fills your entire home. Trust me, once you try this method, you’ll never want to bake bread any other way!
Hearth Baking
There’s something truly magical about bread baked in a traditional hearth. When I first experienced the crackling crust and perfect crumb of hearth-baked bread, I knew there was no going back to conventional oven baking. The intense radiant heat and steam created in a hearth oven produce that coveted crispy, blistered crust that artisan bakers strive for.
Don’t worry if you don’t have access to a proper brick hearth oven – there are several ways to recreate these conditions at home. My favorite method involves using a baking stone or steel, preheated for at least an hour at your oven’s highest temperature. Place a cast iron skillet on a lower rack and add boiling water when you put in your bread to create that essential steam environment.
Dutch ovens are another excellent alternative, providing a sealed environment that traps steam naturally. For the closest hearth-like results, preheat the Dutch oven along with your oven for about 45 minutes before baking. This method consistently gives me that professional-quality crust I used to think was only possible in commercial bakeries.
Remember, whichever method you choose, the key is high heat and steam – these elements are what give hearth-baked bread its distinctive character.
In a world of instant gratification and convenience foods, traditional bread making stands as a testament to the enduring power of time-honored culinary practices. As we’ve explored throughout this article, the art of making bread by hand isn’t just about creating sustenance – it’s about connecting with generations past and cultivating transformative kitchen practices that enrich our daily lives.
The simple act of kneading dough, watching it rise, and sharing freshly baked bread with loved ones creates moments of mindfulness and community that are increasingly rare in our fast-paced world. Many of us have discovered that traditional bread making offers a therapeutic escape from digital distractions while providing incomparable flavors and textures that mass-produced alternatives simply can’t match.
Whether you’re a novice baker or an experienced home chef, embracing traditional bread making techniques allows you to take control of your food’s quality, ingredients, and preparation process. It’s a skill that not only produces delicious results but also builds confidence, patience, and a deeper appreciation for the craft of baking.
As we continue to navigate modern life’s challenges, let’s remember that sometimes the most rewarding experiences come from slowing down and reconnecting with traditional practices. Your journey into traditional bread making might start with a simple loaf, but it can lead to a lifetime of culinary adventures and meaningful connections around the kitchen table.