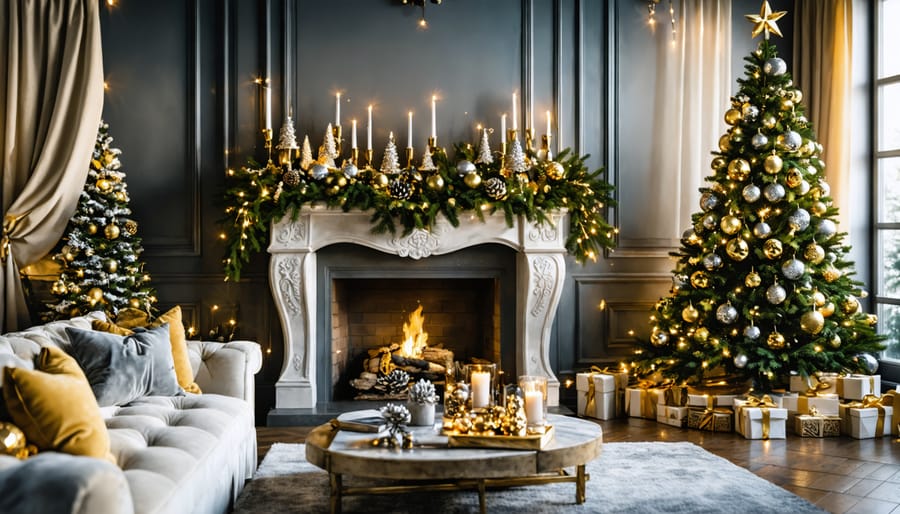
Transform ordinary materials into luxurious Christmas décor while decorating on a budget. Craft stunning metallic pinecone garlands by dipping foraged pinecones in gold or silver paint, then string them together with silk ribbon for an upscale mantel display. Create elegant paper snowflakes using metallic cardstock and precise geometric patterns, mounting them on dark walls for dramatic contrast. Layer white fairy lights behind sheer white fabric panels to design a ethereal backdrop that rivals high-end department store displays.
The secret to achieving expensive-looking holiday décor lies in thoughtful material selection and meticulous execution. Choose monochromatic color schemes, incorporate natural elements like fresh greenery, and focus on creating statement pieces that command attention. Mercury glass effects on plain glass containers, achieved with looking-glass spray paint, add instant sophistication to tablescapes and window displays. Even simple white paper bags transformed into luminaries take on a refined appearance when arranged in precise patterns and filled with flameless candles.
Modern elegance doesn’t require a designer budget – just creativity and attention to detail. By focusing on clean lines, strategic lighting, and carefully chosen metallic accents, your handmade decorations will capture the sophisticated holiday atmosphere you’re envisioning.
Timeless Natural Elements for Sophisticated Holiday Decor
Pine and Cedar Elegant Arrangements
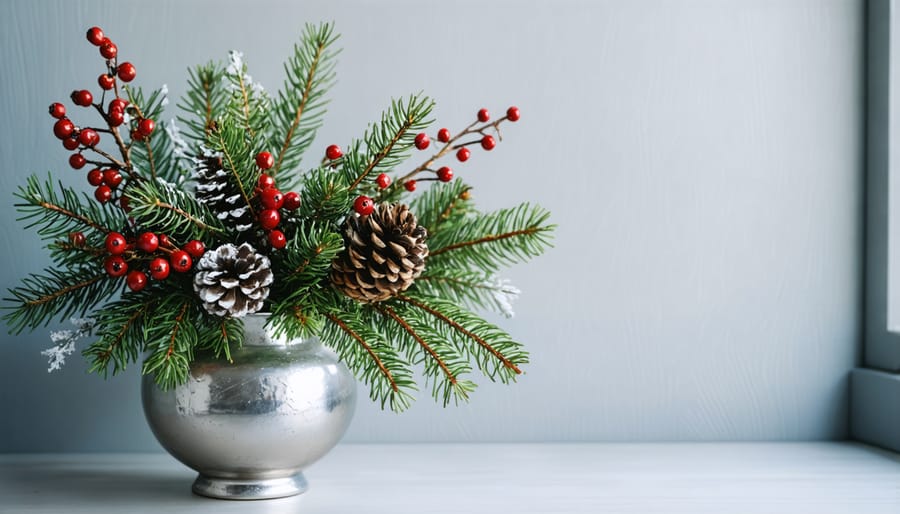
Fresh pine and cedar can transform your home into a winter wonderland while adding that coveted elegant touch to your holiday décor. I love working with these fragrant evergreens because they instantly elevate any space with their natural beauty and enchanting aroma.
Start by gathering an assortment of pine branches, cedar sprigs, and pinecones from your yard or local garden center. For a stunning mantel arrangement, layer different lengths of greenery to create depth, allowing longer branches to cascade gracefully over the edges. Weave in some battery-operated fairy lights for a magical evening glow.
Create elegant coffee table centerpieces by arranging shorter pine and cedar sprigs in vintage mercury glass vases or metallic containers. Add white pillar candles of varying heights and scatter a few silvered pinecones for an sophisticated touch that looks straight out of a designer magazine.
Don’t forget your entryway! Fashion a welcoming door swag by binding together cedar and pine branches with floral wire. Enhance it with a velvet ribbon in deep burgundy or navy blue, and tuck in some dried orange slices and cinnamon sticks for a subtle festive accent.
Pro tip: Mist your arrangements with water every few days to keep them fresh throughout the season. You can also add glycerin to your water spray to help the greenery retain moisture longer.
Dried Orange and Cinnamon Garlands
Transform your home into a fragrant winter wonderland with these stunning holiday garlands made from dried orange slices and cinnamon sticks. This timeless decoration brings together natural elements with a sophisticated touch that looks far more expensive than it actually is.
Start by slicing oranges into thin, uniform rounds (about 1/4 inch thick). Pat them dry with paper towels and arrange them on a baking sheet lined with parchment paper. Place them in the oven at 200°F (93°C) for about 4-6 hours, flipping occasionally until completely dried. The low temperature helps preserve their vibrant color while removing all moisture.
Once your orange slices are ready, gather your materials: dried orange slices, cinnamon sticks, natural twine or ribbon, and a large needle. Thread your twine through the needle and begin stringing alternating pieces of orange slices and cinnamon sticks. Leave about 2 inches of space between each element for a balanced, professional look.
For added charm, incorporate small pine cones or star anise between the oranges and cinnamon. The key to achieving an elegant look is maintaining consistent spacing and mixing textures thoughtfully. Finish by creating loops at each end for hanging.
These garlands look stunning draped across mantels, wrapped around banisters, or hung in windows where natural light can illuminate the translucent orange slices. Plus, they’ll fill your home with a subtle, festive fragrance throughout the season.
Metallic Magic: Sophisticated Touches
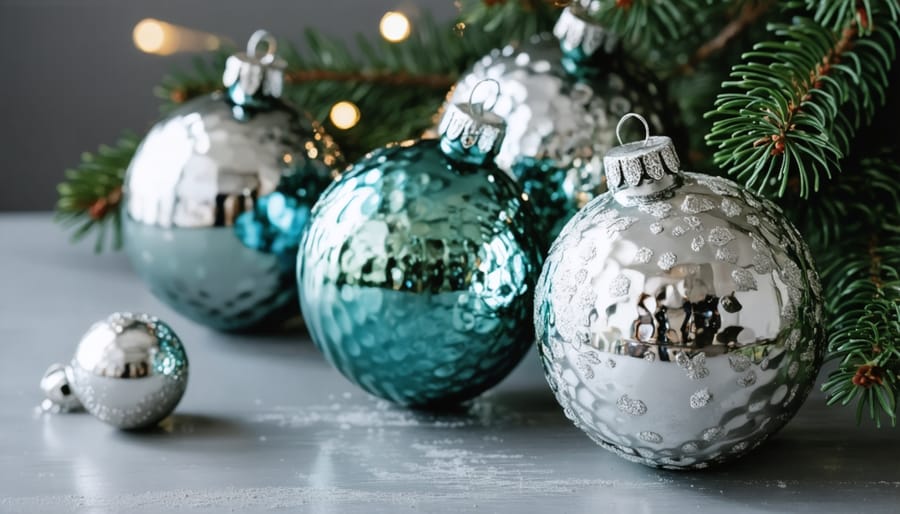
Mercury Glass Effect Ornaments
Want to add instant elegance to your Christmas tree? These DIY mercury glass ornaments create that coveted antique shimmer without the hefty price tag of genuine vintage pieces. I discovered this technique last holiday season, and my guests couldn’t believe these weren’t expensive store-bought decorations!
Start with clear glass ornaments (available at any craft store), Krylon Looking Glass spray paint, and a spray bottle filled with equal parts white vinegar and water. The magic happens in layers: First, spray the inside of your ornament with the Looking Glass paint, gently rotating to coat evenly. While the paint is still wet, lightly mist with your vinegar solution – this creates those characteristic mercury glass “spots.”
Let each layer dry for about 10 minutes before repeating the process. I usually do three layers for the perfect antiqued effect, but you can adjust based on how translucent you want your ornaments to be. For extra sparkle, add a touch of silver or gold glitter between layers.
Pro tip: Work in a well-ventilated area and place your ornaments upside down in an egg carton while drying. To finish, tie elegant ribbon in silver or cream through the ornament tops. You can also add vintage-inspired embellishments like pearl strands or crystal drops for additional sophistication.
These mercury glass ornaments look particularly stunning when grouped together on your tree or arranged in a crystal bowl as a centerpiece. They catch and reflect light beautifully, creating that magical holiday glow we all love.
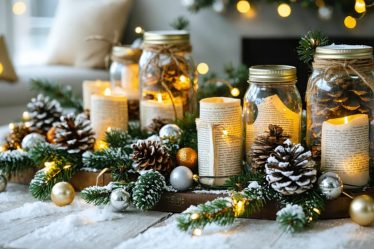
Gold-Dipped Pinecone Arrangements
Transform ordinary pinecones into dazzling holiday decor with this stunning gold-dipped arrangement that looks straight out of a luxury boutique. I discovered this technique last season when looking for ways to elevate my holiday tablescape, and the results were absolutely magical!
Start by collecting medium to large pinecones from your yard or local craft store. Give them a gentle cleaning with a soft brush to remove any debris, then let them dry completely. For the signature metallic finish, you’ll need gold spray paint or liquid gilding paint and a workspace covered with newspaper or a drop cloth.
Hold each pinecone by its stem and dip the tips into your chosen gold paint, allowing excess to drip off. For a more natural look, only coat the outer edges of the scales. Let them dry upside down for about an hour. For extra sparkle, you can add a light dusting of gold glitter while the paint is still tacky.
Arrange your gilded pinecones in a clear glass bowl or silver vessel, mixing in some untreated pinecones for contrast. Add battery-operated fairy lights between the pinecones for a warm, enchanting glow. For a more dramatic display, create a centerpiece by clustering them with white pillar candles and evergreen sprigs on a metallic tray.
This elegant arrangement works beautifully on mantels, coffee tables, or as a dining table centerpiece. The best part? These sophisticated decorations cost just a fraction of store-bought versions while looking just as luxurious.
Luxurious Paper Crafts
3D Paper Snowflakes
Transform ordinary paper into stunning 3D snowflakes that look like they’ve been plucked from a winter wonderland. I discovered this technique during a crafting session with my daughter, and now these elegant decorations have become our cherished holiday tradition.
To begin, gather six squares of white paper (computer paper works perfectly), scissors, a stapler, and clear fishing line for hanging. Fold each square diagonally twice to create smaller triangles, then cut three to four evenly spaced lines along each folded edge, being careful not to cut all the way through.
Gently unfold your paper and begin shaping the “petals” by rolling the inner cut sections toward the center, creating delicate curves. Secure each rolled section with a small staple. This step requires patience, but it’s where the magic happens – each curl adds depth and dimension to your snowflake.
Once all six pieces are shaped, staple them together at their centers, rotating each piece slightly to create an even, circular shape. As you attach the final piece, you’ll see your snowflake come to life with intricate layers and beautiful shadows.
For an extra touch of elegance, lightly dust the edges with silver glitter or pearl-finish craft paint. Hang these ethereal creations at varying heights using clear fishing line to create a magical floating effect. They’re particularly stunning when catching light from windows or twinkling Christmas lights.
Origami Christmas Stars
Transform ordinary paper into stunning celestial decorations with these elegant origami Christmas stars. I discovered this technique during a holiday crafting session with friends, and I’ve been hooked ever since! The best part? You’ll only need square origami paper in metallic or festive colors to create these sophisticated ornaments.
Start by selecting 6-inch square papers in coordinating colors – I love mixing pearl white with gold or silver for that extra touch of elegance. Fold your paper diagonally to create a triangle, then fold it in half again. Open it slightly and push the sides inward to form a diamond shape. Create a crease along the center, then fold the outer corners toward the middle point.
The magic happens when you connect multiple units together. You’ll need five pieces to form one star, each folded identically. Slot the pieces together, tucking the flaps into each other’s pockets. As you assemble the final piece, you’ll see your star taking shape.
For an elevated look, try using double-sided paper with different patterns or colors on each side. String these stars together to create a ethereal garland, or suspend them individually from silk ribbons at varying heights. They look particularly striking when arranged in clusters near windows, where light can catch their metallic surfaces and create a enchanting display.
Remember, patience is key with origami – take your time with each fold to achieve those crisp, clean lines that make these stars truly elegant.
Fabric and Ribbon Elegance
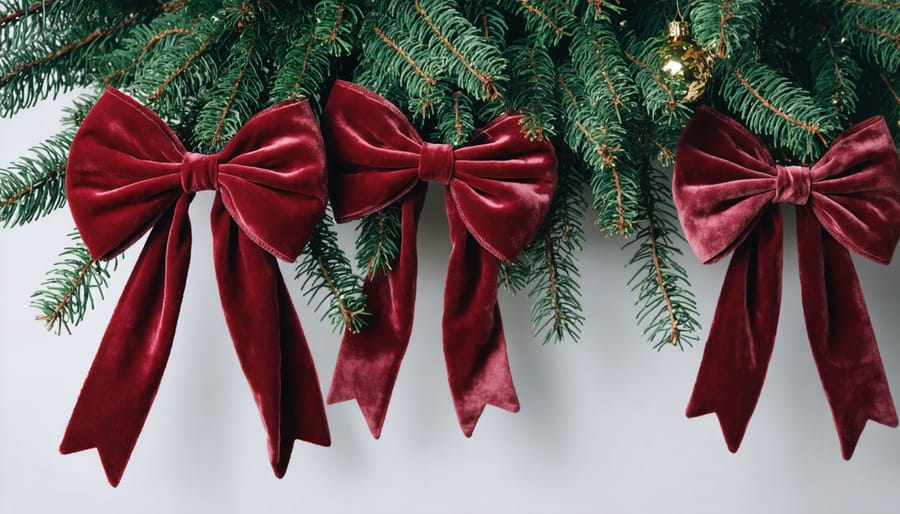
Velvet Bow Tree Ornaments
Transform your Christmas tree into a luxurious showcase with handmade velvet bow ornaments that exude elegance and charm. I discovered this technique last holiday season, and it’s become my go-to for adding a touch of sophistication to my decorations without breaking the bank.
Start with high-quality velvet ribbon in rich, seasonal colors like deep burgundy, emerald green, or classic navy. I find that 2-inch wide ribbon works best for creating perfectly proportioned bows that stand out on the tree. For each ornament, cut a 12-inch length of ribbon for the main bow and a 4-inch piece for the center knot.
Form your bow by creating two equal loops, leaving a small tail at each end. Pinch the center tightly and secure it with the smaller piece of ribbon, wrapping it around the middle and hot gluing it in place. The key to achieving that designer look is to carefully adjust the loops until they’re perfectly symmetrical.
Add a touch of sparkle by attaching a small rhinestone or pearl button to the center knot. Finally, create a hanging loop using thin gold or silver cord. These bows look particularly stunning when clustered together in groups of three at varying heights on your tree.
No-Sew Table Runners
Transform your holiday table into a luxurious centerpiece with these no-sew table runners that look designer-made but cost a fraction of store-bought options. I discovered this technique last Christmas when searching for a way to dress up my dining room without breaking the bank, and the results were absolutely stunning!
Start with a length of high-quality fabric like velvet, satin, or metallic-threaded material, cut to your desired runner dimensions plus an extra inch on each side. For a polished edge without sewing, apply iron-on hem tape along all four sides, following the package instructions carefully. Press firmly with a warm iron, allowing each edge to cool completely before moving to the next.
To elevate the look, add decorative elements like metallic ribbon trim, crystal beads, or delicate tassels using fabric glue. Create a cohesive holiday theme by choosing colors that complement your existing decor – think deep emerald green, rich burgundy, or classic winter white with gold accents.
For extra impact, layer multiple runners in coordinating colors or add battery-operated micro LED lights beneath sheer fabric for a magical glow. Remember to press out any wrinkles before displaying, and store flat between uses to maintain that elegant appearance year after year.
As we wrap up our elegant DIY Christmas decoration journey, let’s ensure your handcrafted treasures remain beautiful for years to come. Store delicate ornaments and enchanting holiday decorations in sturdy boxes with tissue paper between layers. For fabric items like table runners or stockings, clean them gently before storing and avoid folding in the same places each year to prevent permanent creases.
A pro tip I’ve learned from years of crafting: take photos of your favorite arrangements before packing them away. These pictures will serve as inspiration next season and help you recreate those perfect vignettes. Consider creating a “decoration map” noting which pieces work best in specific spaces.
When styling your DIY decorations, remember the rule of odd numbers and varying heights. Group items in threes or fives, and use cake stands or decorative boxes to create different levels. Don’t feel pressured to display everything at once – sometimes less truly is more when aiming for elegance.
Maintain the sparkle of metallic elements by dusting regularly with a soft cloth, and refresh natural elements like pine cones or dried oranges with a light spritz of essential oils to keep them fragrant throughout the season. Remember, your handmade decorations tell your unique story, so display them proudly and let them evolve with your style year after year.