

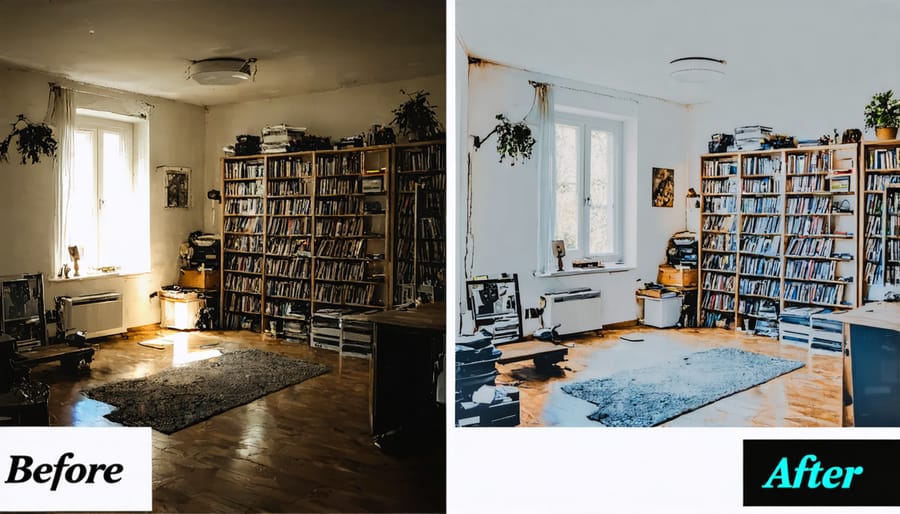
Transform your cleaning routine from overwhelming to effortless with this proven 4-step process that’s revolutionizing how busy households tackle their cleaning tasks. Whether you’re a cleaning enthusiast or someone who dreads the chore, this systematic approach breaks down the entire process into manageable chunks that deliver professional-level results every time.
The beauty of this method lies in its simplicity and efficiency – no more scattered cleaning attempts or forgotten corners. By following these four strategic steps, you’ll create a natural flow that ensures every space receives proper attention while maximizing your time and energy. From busy professionals to parents juggling multiple responsibilities, this process adapts to your schedule while maintaining the high standards your home deserves.
Get ready to discover a cleaning routine that not only transforms your space but also brings a sense of accomplishment and order to your daily life. This tried-and-tested approach has helped thousands of homeowners maintain spotless spaces without feeling overwhelmed or burned out.
Step 1: Declutter and Organize
The 15-Minute Sort Method
The first step in our cleaning process is what I like to call the “15-Minute Sort Method,” and it’s a game-changer for anyone feeling overwhelmed by the task ahead. Before diving into deep cleaning, spend just 15 minutes quickly sorting items in your space. Think of it as the warm-up exercise for decluttering your space.
Grab three boxes or bags and label them: Keep, Donate, and Trash. Set a timer for 15 minutes and move through your space with purpose, making quick decisions about items that are clearly out of place or no longer serving you. Don’t get caught up in emotional decisions or complicated sorting – this is about identifying the obvious items that need attention.
I discovered this method when I was constantly postponing my cleaning routine because everything felt too overwhelming. Now, this quick sort helps create instant visual progress and sets the stage for a more thorough cleaning session. Remember, we’re not aiming for perfection here – just a clearer space to work with in the following steps.
Storage Solutions That Last
After all that hard work decluttering and cleaning, the last thing you want is to start the process all over again in a few weeks. That’s why smart storage solutions are essential for maintaining your newly organized space. I learned this the hard way after countless reorganizing sessions until I finally discovered what truly works.
Start by investing in clear storage containers – they’re game-changers for keeping items visible and accessible. Group similar items together and label everything, even if you think you’ll remember what’s inside. Trust me, you’ll thank yourself later! Consider using vertical space with wall-mounted shelves or over-door organizers to maximize storage in smaller rooms.
One of my favorite tricks is the “one in, one out” rule: whenever you bring something new home, remove an old item to maintain the balance. Also, make sure to store frequently used items at eye level and seasonal items up high or in less accessible spaces. Remember, the goal isn’t just to hide things away, but to create intuitive systems that make it easy to maintain order in your daily life.
Step 2: Surface Cleaning
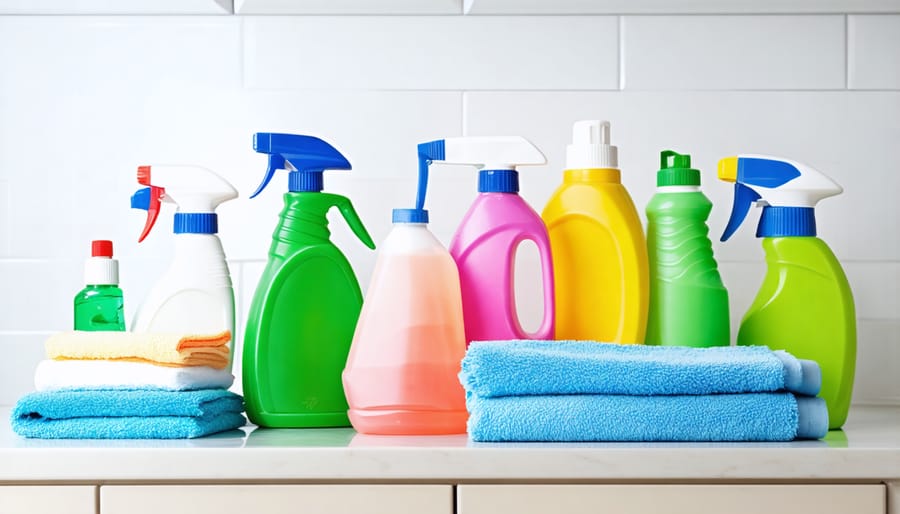
Essential Cleaning Supplies
Having the right cleaning supplies on hand makes all the difference in achieving a sparkling clean home. As someone who’s tried countless products over the years, I’ve narrowed down my must-have cleaning arsenal to these essential items.
Start with an all-purpose cleaner for tackling multiple surfaces – I prefer ones with natural ingredients that still pack a punch. A good glass cleaner is non-negotiable for streak-free windows and mirrors. You’ll also need a disinfectant spray or wipes for germ-prone areas like doorknobs and light switches.
For tools, invest in microfiber cloths (they’re game-changers!), a durable scrub brush, and a reliable vacuum cleaner. Don’t forget a mop with washable pads for hard floors. I always keep white vinegar and baking soda on hand – these pantry staples work wonders for tough stains and odors.
My secret weapon? A caddy to carry everything from room to room. It’s such a time-saver when you have all your supplies organized and within reach. Trust me, having these basics ready to go makes the whole cleaning process so much smoother!
Room-by-Room Surface Guide
Different rooms require different cleaning approaches, so let’s break it down for maximum efficiency. In your kitchen, focus on countertops, appliance surfaces, and cabinet fronts using appropriate cleaners for each material. For stainless steel, always wipe in the direction of the grain, and remember that a thorough sanitizing approach is especially important for food preparation areas.
In bathrooms, tackle porcelain surfaces first, followed by mirrors and chrome fixtures. Don’t forget those often-overlooked spots like toilet hinges and faucet bases. For living areas, dust wooden furniture with appropriate polish, and use microfiber cloths on electronics to avoid scratches.
In bedrooms, focus on nightstands, dressers, and window sills, working from top to bottom. Pay special attention to headboards and bed frames, which often collect dust in hidden corners. For home offices, keep electronics clean with appropriate solutions, and remember to sanitize frequently touched items like keyboards and mouse pads regularly.
Remember to always test new cleaning products on a small, hidden area first to ensure they won’t damage your surfaces.
Step 3: Deep Clean
High-Traffic Areas
Let’s talk about those busy spots in your home that seem to attract chaos like a magnet! I learned the hard way (after hosting countless family gatherings) that high-traffic areas need special attention in our cleaning routine. These are the spaces where life happens most intensely – your entryway, kitchen, main bathroom, and living room.
In the entryway, focus on surfaces that collect daily debris: shoe racks, doorknobs, and that catch-all table where everyone dumps their keys and mail. The kitchen, especially around the sink and stove, requires extra vigilance since it’s where food prep meets family gatherings. Don’t forget those cabinet handles and light switches that everyone touches!
Your main bathroom is another hotspot that needs particular care. Pay special attention to faucets, toilet handles, and doorknobs – these are touch points that can harbor the most germs. In the living room, focus on the coffee table, remote controls, and any surfaces where drinks and snacks are regularly enjoyed.
Remember, these high-traffic areas aren’t just about visible dirt – they’re also where germs tend to congregate. Making these spaces a priority in your cleaning routine will give you the biggest impact for your effort, keeping your home both looking and feeling fresh.
Hidden Spots Often Missed
You know those moments when you think you’ve cleaned everything, only to discover dusty spots you completely forgot about? I’ve been there too! Let me share some commonly overlooked areas that deserve attention during your cleaning routine.
Door frames and baseboards often collect an impressive amount of dust without us noticing. Light fixtures and ceiling fans are classic hiding spots – I once found a year’s worth of dust on my dining room chandelier! Those window tracks where your sliding windows sit? They’re notorious for collecting dirt and debris.
Don’t forget about appliance undersides and gaps. The space between your refrigerator and cabinets, the underside of your microwave, and even the bottom of your toaster deserve some TLC. Small appliance cords and wall plates for electrical outlets are other sneaky dust collectors.
In the bathroom, check behind the toilet and under the sink cabinet – areas we tend to skip during regular cleaning. The tops of picture frames and mirrors often go unnoticed too. And here’s one that surprised me: air vents and return grilles. They’re literally above our heads, making them easy to forget but important to clean for better air quality.
Step 4: Maintain and Prevent
Daily Quick-Clean Routine
Keeping your home consistently clean doesn’t have to feel like climbing a mountain every day. As a busy mom of two, I’ve learned that establishing a quick daily routine can make all the difference. Think of it as maintenance mode – those little things you do each day to prevent bigger messes from taking over.
Start your morning by making your bed immediately after waking up. This simple act sets a positive tone for the day and instantly makes your bedroom look tidier. As you move through your morning routine, wipe down bathroom surfaces after use and pop any dirty clothes straight into the hamper.
Throughout the day, adopt the “clean as you go” mindset. Put dishes directly into the dishwasher after meals, wipe kitchen counters after cooking, and do a quick sweep or vacuum of high-traffic areas. I keep cleaning supplies easily accessible in key areas of my home, making it simpler to tackle small messes before they become bigger problems.
Before bedtime, spend just 10-15 minutes on a quick reset: clear surfaces, put away items that have migrated from their homes, and do a final wipe-down of kitchen counters. These small daily habits add up to a consistently cleaner home with minimal effort.
Weekly Maintenance Schedule
Keeping your home consistently clean becomes effortless when you follow a structured weekly schedule. I’ve found that breaking down maintenance tasks by day prevents cleaning from becoming overwhelming while ensuring every area gets the attention it deserves.
Monday: Focus on bathrooms, including a quick wipe-down of surfaces, toilet cleaning, and floor mopping.
Tuesday: Tackle bedrooms by changing linens, dusting surfaces, and vacuuming floors.
Wednesday: Kitchen day! Clean countertops, appliance exteriors, and sweep/mop floors.
Thursday: Living areas get attention with dusting, cushion fluffing, and floor care.
Friday: Quick whole-house touch-up, focusing on high-traffic areas.
Saturday: Tackle one rotating deep-cleaning task (windows, baseboards, etc.).
Sunday: Rest and reset – just 15 minutes of general tidying.
Remember, this schedule is flexible – adapt it to your lifestyle! As a busy mom of two, I often swap days around based on our family’s activities. The key is consistency rather than perfection. Start with this framework and adjust until you find your perfect rhythm.

By following this systematic 4-step cleaning process, you’ll transform your cleaning routine from a daunting task into a manageable, effective system that works for your lifestyle. Not only will you save time and energy, but you’ll also maintain a consistently clean and organized home that brings you joy and peace of mind. Remember, the key to success lies in making this process a regular habit – start small if needed, but stay consistent. Trust me, once you experience the satisfaction of completing each step and seeing the results, you’ll wonder how you ever cleaned any other way. So why not give it a try today? Your future self will thank you for establishing this simple yet powerful cleaning routine that keeps your home looking and feeling amazing all week long.