
Transform your home into a festive wonderland with handcrafted pine cone garlands, vintage book page ornaments, and illuminated mason jar lanterns – signature touches that elevate your space beyond traditional decorations. Mix foraged natural elements with modern metallic accents to create stunning tablescapes and mantel displays that reflect your unique style while embracing eco-friendly holiday celebrations. Replace conventional tree ornaments with cherished family photographs in miniature copper frames, vintage costume jewelry, or hand-painted wooden shapes that tell your personal story. Craft statement pieces from unexpected materials like driftwood holiday trees, geometric paper wreaths, or suspended botanical installations that become instant conversation starters. These distinctive decorations merge timeless holiday charm with contemporary design sensibilities, creating a celebration space that’s uniquely yours without compromising on festive warmth or seasonal magic.
Nature-Inspired Holiday Magic
Foraged Forest Finds
Nature’s bounty offers some of the most beautiful and sustainable holiday decorations you can find. Last weekend, I took my kids on what we called a “treasure hunt” through our local park, and we returned with a magical collection of natural elements that transformed our home into a winter wonderland.
Start by gathering pinecones of various sizes – look for ones that have fully opened and are free from damage. Give them a gentle shake to remove any insects, then lay them on a baking sheet and warm them in the oven at 200°F for about 30 minutes to eliminate any remaining critters and sap.
Evergreen branches make stunning mantel arrangements or table runners. Select branches with different textures and shades of green, mixing spruce, pine, and cedar for visual interest. Pro tip: mist them daily with water to keep them fresh throughout the season.
Don’t overlook winter berries! Red winterberries, blue juniper berries, and white snowberries create stunning pops of color. Place them in clear glass vases or weave them into wreaths. Remember to check which berries are safe to bring indoors, especially if you have pets or small children.
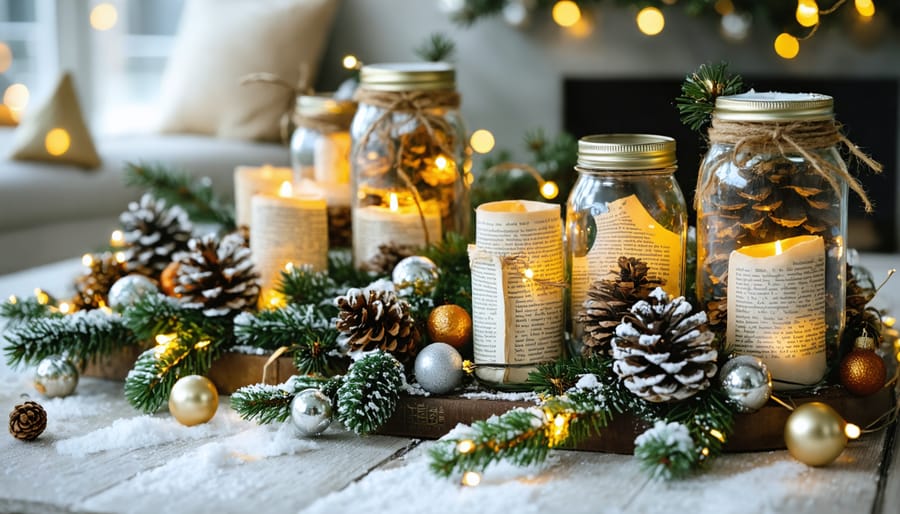
For an elegant touch, spray paint some pinecones in metallic gold or silver, or dust them lightly with artificial snow. Arrange them in a vintage bowl with fairy lights for a magical centerpiece that brings the forest’s beauty right to your table.

Dried Orange Garlands
There’s something magical about the warm, spicy scent of dried oranges wafting through your home during the holidays. I discovered this charming decoration technique last winter, and it’s become one of my favorite sustainable holiday traditions. Let me guide you through creating these stunning garlands that bring a touch of natural elegance to your space.
Start by slicing navel oranges into approximately 1/4-inch thick rounds. Pat them dry with paper towels to remove excess moisture. For best results, choose firm oranges without blemishes. Arrange the slices on a baking rack placed over a baking sheet, ensuring they don’t overlap. Set your oven to its lowest temperature setting (usually around 170°F) and let the orange slices dry for 4-6 hours, flipping them every hour or so.
Once your orange slices are completely dry and slightly translucent, they’re ready for stringing. Thread a large needle with natural twine or ribbon, spacing the orange slices about 2-3 inches apart. For added visual interest, intersperse cinnamon sticks, star anise, or bay leaves between the orange slices.
These gorgeous garlands can grace your mantel, wrap around your Christmas tree, or hang in sunny windows where they’ll catch the light beautifully. As a bonus, they’ll fill your home with a subtle citrusy-sweet fragrance throughout the season. Store them in an airtight container after the holidays, and they’ll be ready to bring their charm to next year’s celebrations too.
Upcycled Holiday Treasures
Mason Jar Magic
There’s something magical about transforming everyday mason jars into enchanting holiday decorations, especially when decorating on a budget. These versatile glass containers can become stunning centerpieces with just a few simple materials and a dash of creativity.
For luminaries, start by cleaning your mason jars thoroughly and removing any labels. Add a coating of frosted glass spray paint for a dreamy, winter-inspired look, or use white acrylic paint and Epsom salt for a snowy effect. Place battery-operated fairy lights inside, and watch as your space transforms into a cozy winter wonderland. Pro tip: try arranging jars of different sizes together for a more dynamic display.
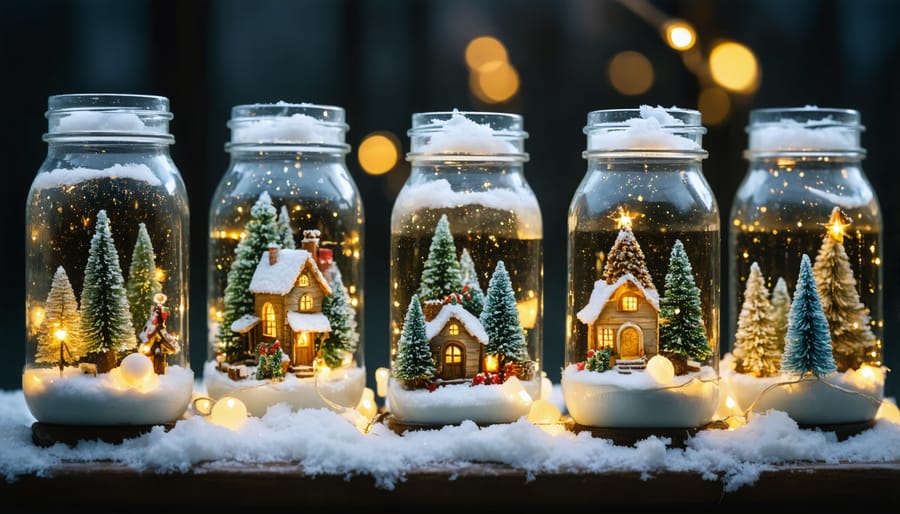
Creating mason jar snow globes brings out the child in all of us. Fill your jar with distilled water, a touch of glycerin (this helps the “snow” fall more slowly), and a sprinkle of glitter or artificial snow. Secure small holiday figurines or miniature trees to the jar lid using waterproof adhesive, then seal tightly. Remember to test for leaks before displaying!
For an extra special touch, wrap twine or ribbon around the jar’s neck, or add sprigs of artificial pine and berries. These charming decorations work beautifully on mantels, windowsills, or as table centerpieces. The best part? Each piece tells its own story and can be customized to match your holiday style perfectly.
Paper Paradise
Transform your old books and magazines into stunning holiday decorations that tell a story while adding a sophisticated touch to your seasonal display. I discovered this creative approach last year when I was looking to give my holiday decor a more personal touch, and the results were absolutely magical.
Start by selecting books with weathered pages or magazines with interesting color patterns. Paper roses are a fantastic beginner project – simply roll individual pages in a spiral pattern, securing the base with craft glue. Arrange these in vintage teacups or string them together to create a whimsical garland.
For a show-stopping centerpiece, try creating a book tree by folding pages into simple triangles and stacking them in a circular pattern. Spray paint it silver or gold for extra holiday sparkle, or leave it natural for a rustic look. Magazine pages work beautifully for intricate paper snowflakes – the glossy finish adds an unexpected shimmer to traditional designs.
One of my favorite techniques is creating dimensional ornaments by carefully folding book pages into accordion patterns. When arranged in a full circle, they create stunning spheres that catch the light beautifully. Add a touch of glitter to the edges or leave them natural for a more understated elegance.
Remember to choose books that are beyond repair or magazines you’ve already read – this way, you’re giving new life to items that might otherwise end up in recycling. The result is eco-friendly decor that’s both meaningful and memorable.
Personalized Holiday Touches
Memory Ornaments
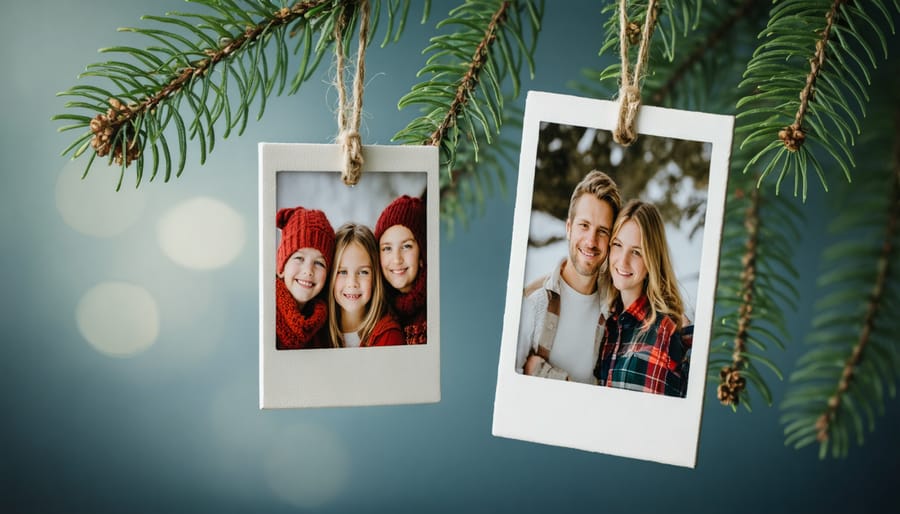
Transform cherished memories into stunning holiday decorations that tell your family’s unique story. I’ll never forget the way my daughter’s eyes lit up when she discovered an ornament featuring her first ballet recital photo hanging on our tree. These personalized touches create meaningful holiday memories that last generations.
Start by gathering family photos, ticket stubs, children’s artwork, and other mementos that represent special moments. Clear glass ornaments make perfect vessels for displaying these treasures – simply remove the top, carefully insert your items, and seal. For photos, create double-sided miniatures and laminate them before adding a decorative ribbon for hanging.
Another heartwarming approach is to craft a memory garland. String together copies of vintage family holiday cards, handwritten recipes from grandma’s collection, or children’s handprint artwork. Use miniature clothespins painted in festive colors to clip items along twine or ribbon for an evolving display that grows with your family.
Consider creating a dedicated memory tree if space allows. Each year, add new ornaments that commemorate significant moments – a baby’s first Christmas, family vacations, or special achievements. Label each piece with the date and a brief description on the back to preserve the story for years to come.
For a modern twist, design photo ornaments using clear acrylic shapes. Print photos on transparency paper and sandwich them between acrylic pieces, securing the edges with metallic tape. This sleek approach works beautifully with both color and black-and-white images, creating a sophisticated yet deeply personal display.
Remember to store these precious decorations with extra care. Use divided storage containers lined with soft material, and keep them in a climate-controlled space to ensure they remain beautiful for future holiday seasons.
Custom Color Stories
Who says holiday decorating has to stick to traditional red and green? Creating your own custom color story can transform your holiday décor into a unique expression of your personal style. I remember the year I broke away from convention and decorated with peacock blues and copper – the compliments from guests never stopped coming!
Start by identifying colors that resonate with your existing home décor or that simply bring you joy. Perhaps you’re drawn to the sophistication of winter whites and silver, or maybe you love the unexpected charm of pink and sage green. The key is choosing a palette that feels authentic to you while maintaining a festive spirit.
Consider building your color story around these popular alternative combinations:
– Coastal cool: Navy, white, and sandy beige
– Nordic minimal: Gray, white, and natural wood tones
– Desert modern: Terracotta, sage, and gold
– Ice princess: Light blue, silver, and crystal white
– Woodland whimsy: Forest green, mushroom brown, and cream
When implementing your chosen palette, follow the 60-30-10 rule: use your main color for 60% of your decorations, a secondary color for 30%, and an accent color for the remaining 10%. This creates visual harmony while maintaining interest.
Don’t forget to play with different textures within your color scheme. Mix metallic ornaments with matte finishes, pair smooth surfaces with chunky knits, and incorporate natural elements that complement your chosen hues. Even monochromatic schemes can be stunning when you vary textures and materials.
Remember, your holiday color story can extend beyond traditional decorations. Consider coordinating gift wrap, table settings, and even holiday attire with your chosen palette for a cohesive look that feels thoughtfully curated. The result will be a holiday space that’s uniquely yours and memorable for all who visit.
As we wrap up our journey through unique holiday decorating, remember that the most meaningful decorations are often the ones created with love and personal touches. I still cherish the pinecone wreath I made with my children five years ago – it’s not perfect, but it tells our family’s story every time we hang it up.
Creating your own holiday decorations isn’t just about saving money or following trends; it’s about infusing your space with personality and creating memories that last far beyond the season. Whether you’re crafting your first paper snowflake or tackling an ambitious LED light installation, each handmade piece adds a layer of warmth and authenticity to your holiday home.
Don’t feel pressured to transform your entire home overnight. Start small with one or two projects that spark joy and align with your style. Maybe it’s those dried orange garlands we discussed, or perhaps it’s upcycling old sweaters into cozy throw pillows. The beauty of DIY holiday decor lies in the journey – the quiet afternoons spent crafting, the happy accidents that turn into beloved traditions, and the pride of displaying something uniquely yours.
Remember, your home should reflect your story, and there’s no better way to tell it than through decorations you’ve created yourself. So gather your supplies, embrace your creativity, and let your holiday decorating adventure begin. Your perfect, perfectly imperfect masterpieces await!