

The aroma of butter-browned sage, simmering cranberry sauce, and freshly baked pies does more than fill our homes during the holidays – it weaves together generations of cherished memories and family traditions. These time-tested recipes, passed down through weathered recipe cards and whispered kitchen secrets, tell stories of connecting through cultural recipes that span decades and continents. Whether you’re recreating your grandmother’s perfectly spiced gingerbread or adapting a classic roast turkey for modern dietary needs, these traditional dishes carry the warmth of countless holiday gatherings in every bite. Today’s home cooks are not just preserving these beloved recipes – they’re breathing new life into them, making thoughtful adjustments while maintaining the soul of each dish that makes our celebrations truly special. Join us as we explore the heartwarming world of holiday cooking, where every measuring cup of flour and pinch of spice connects us to those who gathered around festive tables before us, while creating new memories for generations to come.
The Heart of Holiday Cooking: Essential Family Favorites
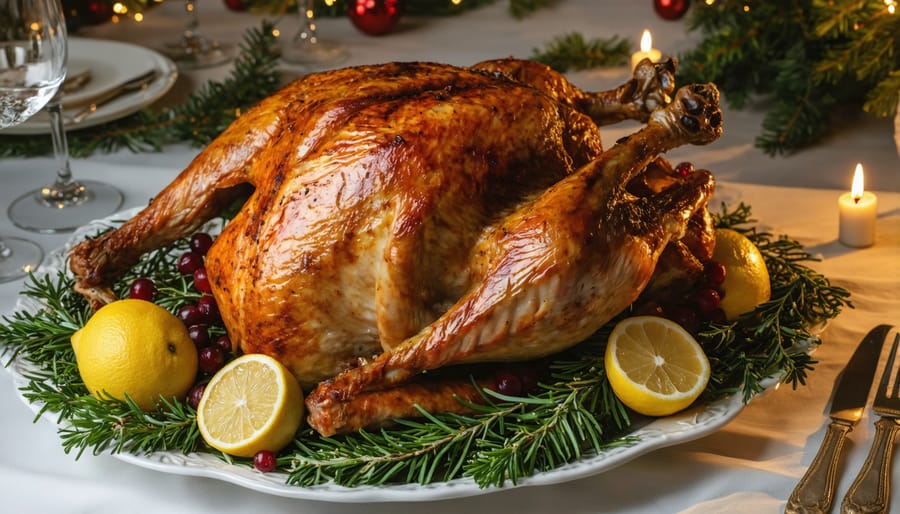
Classic Roast Turkey with Family-Secret Herbs
Every holiday season, I find myself returning to this treasured turkey recipe, passed down through three generations of my family. The secret lies in our unique blend of herbs – a combination that transforms an ordinary roast turkey into a memorable centerpiece that draws everyone to the table.
For a 12-14 pound turkey, begin by creating the herb mixture: finely chop fresh sage, rosemary, and thyme (about 2 tablespoons each), then mix with 1 tablespoon of dried marjoram and a pinch of ground nutmeg. This blend has been perfected over decades of family gatherings, and I still smile remembering how my grandmother would guard these proportions with playful secrecy.
Start by patting your turkey dry with paper towels – this is crucial for achieving that gorgeous golden-brown skin. Gently separate the skin from the meat and massage softened butter mixed with half of your herb blend underneath. This technique ensures the flavors penetrate deep into the meat while keeping it incredibly moist.
Season the cavity generously with salt and pepper, then stuff it with a halved lemon, a quartered onion, and several garlic cloves. Rub the remaining herb butter mixture all over the outside of the turkey, focusing on creating an even coating.
The magic temperature is 325°F (165°C). Calculate roughly 15 minutes per pound, but always use a meat thermometer – it should read 165°F (74°C) when inserted into the thickest part of the thigh. Let the turkey rest for at least 20-30 minutes before carving to keep those precious juices locked in.
My favorite family tip? Baste every 30-45 minutes with a mixture of melted butter and white wine. It adds an incredible depth of flavor and ensures that picture-perfect golden finish.
Grandmother’s Special Glazed Ham
Every time I prepare this glazed ham, I’m transported back to my grandmother’s warm, bustling kitchen during the holidays. The sweet, aromatic glaze filling the house would always signal that something special was in the works. While her original recipe remains a cherished family treasure, I’ve made a few modern adjustments that make it even more accessible for today’s busy home cooks.
The secret lies in selecting a good-quality spiral-cut ham (about 8-10 pounds) and creating the perfect balance of sweet and savory in the glaze. I combine brown sugar, honey, Dijon mustard, and a splash of bourbon (though apple juice works wonderfully as an alcohol-free alternative). The addition of fresh orange zest and a pinch of cloves brings brightness to the traditional flavors.
What makes this recipe truly special is the double-glazing technique. Instead of applying all the glaze at once, I brush it on in layers during the last hour of cooking. This creates a gorgeous, sticky exterior that locks in the moisture and ensures every slice is perfectly flavored. For best results, let the ham rest at room temperature for 30 minutes before baking, and baste it with its own juices every 20 minutes.
My grandmother always said the key to a perfect ham was patience and love, but I’ve discovered that a meat thermometer helps too! The ham is ready when it reaches an internal temperature of 140°F (60°C). While she might raise an eyebrow at some of my modern tweaks, I know she’d approve of how this version still brings families together, creating new memories while honoring old traditions.
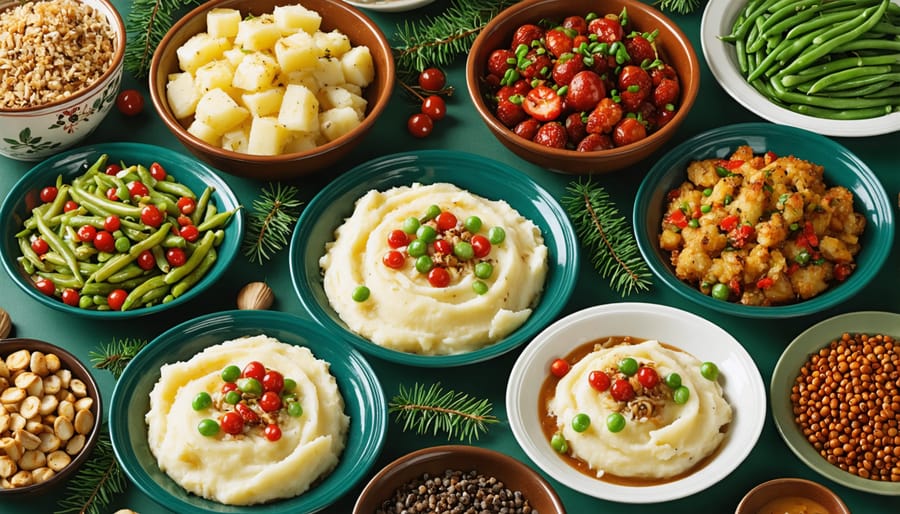
Beloved Side Dishes That Steal the Show
Perfect Creamy Mashed Potatoes
There’s something magical about perfectly creamy mashed potatoes that can elevate any meal from good to extraordinary. As someone who’s spent years perfecting this beloved holiday side dish tradition, I’m excited to share my foolproof method for achieving that restaurant-quality smoothness.
The secret starts with choosing the right potatoes – Yukon Golds are my go-to for their naturally buttery flavor and creamy texture. Always start with cold water when boiling your potatoes, and don’t forget to add a generous pinch of salt to the water. This seasons the potatoes from the inside out.
Here’s my game-changing tip: warm your milk and butter before adding them to the potatoes. Cold dairy can make your potatoes gummy and unpleasant. I heat mine in a small saucepan until the butter is just melted and the milk is warm.
For the smoothest results, use a potato ricer or food mill instead of a masher. If you don’t have either, a hand mixer will work beautifully – just be careful not to overmix, as this can make your potatoes sticky. Add the warm dairy gradually while mixing, and finish with a touch of sour cream for that extra velvety texture.
Remember, seasoning is key. Taste as you go, adjusting salt and pepper until it’s just right. These little details make the difference between good mashed potatoes and ones that’ll have everyone asking for seconds.
Green Bean Casserole with a Twist
Every holiday season, I find myself drawn to the comforting aroma of green bean casserole, but this year, I’m excited to share my updated version that maintains all the nostalgic flavors while incorporating fresh, elevated ingredients. Instead of canned cream of mushroom soup, we’re making a velvety sauce from scratch using fresh cremini mushrooms, shallots, and a splash of white wine – trust me, the extra effort is worth it!
The traditional crispy onion topping gets a gourmet makeover with a mixture of panko breadcrumbs, fresh herbs, and thinly sliced shallots that we’ll crisp up ourselves. For the green beans, I recommend using fresh haricots verts (French green beans) blanched until just tender-crisp, though regular fresh green beans work beautifully too.
What makes this version special is the addition of caramelized mushrooms and a touch of fresh thyme, adding layers of flavor that the original simply can’t match. Don’t worry – it still comes together easily and can be partially prepared ahead of time, perfect for busy holiday cooking.
My family was skeptical about changing our beloved recipe at first, but now they request this version every year. It’s proof that sometimes the best traditions are the ones that evolve while keeping the heart of what made them special in the first place.
Heritage Stuffing Recipe
Every time I prepare this treasured stuffing recipe, I’m transported back to my grandmother’s kitchen, where the aroma of sage and fresh herbs would fill the air during holiday preparations. This recipe has graced our family table for four generations, evolving slightly with each passing of the torch while maintaining its core essence.
The secret lies in the perfect blend of day-old sourdough and cornbread, giving it both structure and that coveted mix of textures. Fresh herbs – sage, thyme, and rosemary – are non-negotiable; they’re what gives this stuffing its distinctive flavor profile that everyone remembers. I’ve learned through years of making this that letting the bread dry naturally for two days creates better results than oven-drying.
My grandmother always insisted on using homemade chicken stock, but I’ll let you in on a little secret: store-bought works just fine if you doctor it with some additional aromatics. The key is sautéing the celery, onions, and carrots until they’re just golden – not brown – to create the perfect foundation.
What makes this recipe truly special is its adaptability. While the traditional version includes Italian sausage, I’ve successfully made vegetarian variations for family members by substituting mushrooms and chestnuts, which provide that same satisfying umami flavor. The recipe has proven that traditions can honor the past while embracing the present.
Sweet Endings: Traditional Holiday Desserts
Classic Pumpkin Pie Made Simple
Every holiday season, I’m reminded of my grandmother’s wisdom: “A perfect pumpkin pie is all about patience and love.” After years of testing and tweaking, I’ve simplified her cherished recipe into a foolproof version that never fails to bring smiles around the holiday table.
For this classic pie, you’ll need: 1 unbaked pie crust, 1 15-oz can of pure pumpkin puree (not pie filling), 3/4 cup granulated sugar, 2 large eggs, 1 12-oz can of evaporated milk, 1 tablespoon pumpkin pie spice, and 1/4 teaspoon salt.
Start by preheating your oven to 425°F. While it’s heating, whisk together the pumpkin puree and sugar until smooth. Beat in the eggs one at a time, then gradually stir in the evaporated milk. Add your spices and salt, mixing until everything is well combined.
Here’s my favorite tip: warm your pie filling slightly in the microwave before pouring it into the crust. This helps eliminate air bubbles and ensures even baking. Pour the warm mixture into your unbaked pie shell and bake for 15 minutes at 425°F. Then, reduce the temperature to 350°F and continue baking for 40-45 minutes, or until a knife inserted near the center comes out clean.
Let the pie cool completely on a wire rack for at least 2 hours before serving. The filling will continue to set as it cools, giving you that perfect, silky texture. Serve with a dollop of whipped cream and watch as your family’s eyes light up with that first heavenly bite.
Remember, small cracks on the surface are completely normal – they’re actually a sign of a perfectly baked pie!
Aunt Marie’s Famous Sugar Cookies
Every holiday season, I’m transported back to my Aunt Marie’s cozy kitchen, where the sweet aroma of vanilla and butter filled the air as we rolled out her famous sugar cookie dough. This recipe has been in our family for four generations, and it’s the perfect canvas for creating beautifully decorated holiday cookies that taste as wonderful as they look.
The secret to these melt-in-your-mouth cookies lies in two special ingredients: pure vanilla extract and a touch of almond extract. Aunt Marie always said, “Never skimp on the vanilla, dear – it’s what makes people come back for seconds!” The dough comes together easily and, unlike many sugar cookie recipes, doesn’t require overnight chilling. Just 30 minutes in the refrigerator, and you’re ready to roll!
What makes these cookies truly special is their versatility. The dough holds its shape beautifully during baking, making it perfect for intricate cookie cutter designs. They’re sturdy enough to handle royal icing but tender enough to practically dissolve on your tongue. My favorite childhood memories involve spending hours at the kitchen table, decorating these cookies with colorful sprinkles and icing alongside my cousins.
Pro tip: Roll the dough between two sheets of parchment paper instead of flouring your surface. This prevents the dough from becoming tough from excess flour and makes cleanup a breeze. Also, don’t overbake – the cookies should be just barely golden around the edges to maintain their soft, perfect texture.
These cookies have graced countless holiday gatherings and cookie exchanges, always earning rave reviews and recipe requests. They’re the kind of cookies that become your family’s tradition too.

Making These Recipes Your Own
While traditional recipes hold a special place in our hearts, don’t be afraid to make them your own! I’ve learned through years of holiday hosting that the best family traditions often come from thoughtful adaptations of classic recipes. The key is maintaining the essence of the dish while accommodating modern needs and preferences.
For dietary modifications, try substituting dairy milk with almond or oat milk in baking recipes, or use gluten-free flour blends in place of all-purpose flour. Many traditional recipes can be easily veganized by using flax eggs (1 tablespoon ground flaxseed mixed with 3 tablespoons water) or aquafaba as egg replacements.
Modern cooking methods can also breathe new life into old favorites. Your grandmother’s slow-cooked stew might work beautifully in an Instant Pot, saving precious holiday time without sacrificing flavor. Looking for some inspiration? Check out these festive twists on classic dishes that perfectly balance tradition with innovation.
Consider incorporating seasonal, local ingredients to create more eco-friendly holiday celebrations. Remember, successful adaptations often come from small, thoughtful changes rather than complete overhauls. Start with one modification at a time, taste as you go, and don’t be afraid to write down your variations – you might just create a new family tradition!
As we wrap up our culinary journey through cherished holiday recipes, remember that the true magic lies not just in the perfectly spiced cookies or the expertly roasted turkey, but in the moments shared around the kitchen counter. These traditional dishes do more than fill our bellies – they connect us to our past while creating meaningful holiday traditions for future generations. Whether you’re faithfully following your grandmother’s handwritten recipe card or adding your own modern twist to a classic dish, you’re weaving your story into the fabric of family history. So this holiday season, invite loved ones into your kitchen, share those treasured recipes, and embrace the beautiful mess of flour-dusted counters and laughter-filled cooking sessions. After all, the best family traditions often begin with a simple recipe and an open heart.